
Molded Threads and How to Design Them
Designing molded threads requires a balance between thread geometry, material shrinkage, assembly loads, and mold extraction. Early engineering and DFM review can identify thread, wall-thickness, draft, and tooling risks before the mold design is finalized.
How can you design efficient plastic threads?
Designing efficient threads starts with selecting the right profile and pitch to accommodate the unique flow characteristics of molten resin. Unlike metal fasteners, these components must be able to withstand the stresses of the molding cycle and ejection without deforming.
When you design plastic threads for an injection mold, rounded roots and crests are generally easier to fill and reduce stress concentration compared with sharp profiles.
Why choose rounded thread profiles?
Rounded or “buttress” thread profiles are far superior for injection molding applications. These shapes allow for better resin flow into the thread peaks and reduce the risk of air entrapment.
Here is the deal:
- Rounded roots increase the overall strength of the thread.
- They help the part release more easily from the mold steel.
- Buttress threads are ideal for handling high axial loads in one direction.
Should you use coarse or fine pitches?
Coarse pitches are almost always preferable for molded components because they provide more surface area for the plastic to grip. Fine threads are prone to stripping and are much harder to fill consistently during the injection process.
Think about it:
- Coarse threads allow for thicker mold steel sections.
- They are more forgiving of minor shrinkage variations.
- Assembly is faster and less prone to cross-threading.
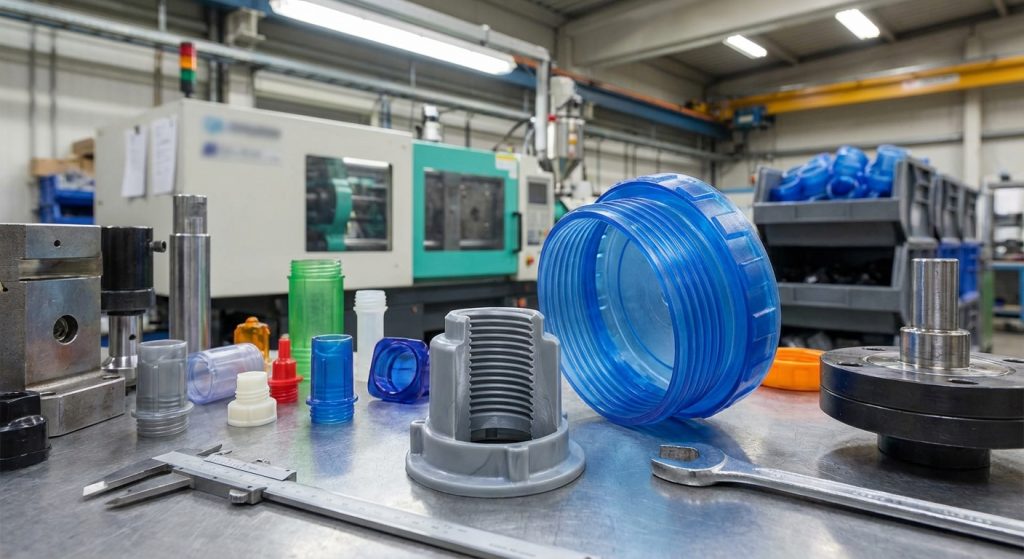
Key Takeaway: Optimized thread design prioritizes rounded profiles and coarse pitches to ensure structural reliability and ease of manufacturing.
| Feature | Design Direction | Reason to Evaluate | |
|---|---|---|---|
| Profile Shape | Rounded or application-specific profile | Flow and stress concentration | |
| Pitch Type | Prefer a moldable pitch | Flow, assembly, and strength | |
| Root Radius | Size for the resin and load | Stress and moldability |
The following table highlights the critical geometric specifications required for high-performance molded fastening systems.
Why do thread size and pitch matter for plastic threads?
Size and pitch are the primary variables that determine the shear strength and long-term durability of your fastening solution. If your plastic threads are too small, the material may not have enough bulk to resist the torque applied during assembly.
Small internal threads can leave a slender core and limited steel strength. Minimum practical diameter must be evaluated from thread form, core construction, steel, resin, injection conditions, extraction method, and required tool life.
How does pitch affect shear strength?
The pitch determines how many “teeth” are engaged at any given time, distributing the load across the part. A coarser pitch allows for a larger cross-section of plastic at each thread, which significantly boosts load-bearing capacity.
But that’s not all:
- Higher pitch reduces the number of turns required for assembly.
- It prevents the “sawing” effect that occurs with fine-pitched metal screws.
- Molded coarse threads have better thermal stability during the cooling phase.
What are the limits of small diameters?
For very small diameters, the mold steel becomes incredibly fragile and prone to breaking. Designers must ensure that the thread depth remains proportional to the overall wall thickness to prevent sink marks.
Consider these factors:
- Minimum diameter recommendations prevent tool breakage.
- Proportional depth ensures uniform cooling.
- Larger diameters allow for more robust unscrewing mechanisms.
Key Takeaway: Select diameter, pitch, engagement, and extraction method from the assembly load, resin, mold strength, and service requirements.
| Parameter | Design Basis | Reason | |
|---|---|---|---|
| Internal Diameter | Core strength and extraction method | Tooling feasibility | |
| Thread Depth | Resin flow and assembly load | Moldability and strength | |
| Engagement Length | Required load and service cycles | Assembly performance |
The data above provides a baseline for sizing threads to avoid common mechanical failures during end-use applications.
Can you use undercuts for your plastic threads?
Yes, you can use undercuts, but they require an extraction strategy such as side-actions, collapsible cores, split geometry, or an unscrewing injection mold, depending on the thread and production requirements.
The complexity of these features often dictates the final cost of the tooling. If you can design the threads to sit on a parting line, you might avoid these expensive mechanisms entirely.
How do side-actions handle threads?
Side-actions move perpendicular to the mold opening to release external threads before the part is ejected. This allows for a fully formed 360-degree thread without the need for manual unscrewing.
Here’s the kicker:
- Side-actions automate the process for high-speed production.
- They ensure high dimensional accuracy across the thread diameter.
- This method is best for external threads on complex geometries.
When are collapsible cores necessary?
Collapsible cores are used for internal threads where an unscrewing motor isn’t feasible. These cores “shrink” inward, allowing the part to be pulled straight off the mold without damage.
Keep in mind:
- They are excellent for high-volume internal thread production.
- They reduce cycle times by eliminating rotation.
- Maintenance costs for these complex tools can be higher.
Key Takeaway: Undercuts are manageable through advanced tooling but require careful evaluation of production volume versus initial mold cost.
| Mechanism | Application | Cost Level | |
|---|---|---|---|
| Side-Action | External Threads | Moderate | |
| Collapsible Core | Internal Threads | High | |
| Manual Inserts | Low Volume | Low |
This comparison clarifies which mechanical solution best fits your specific thread design and budget requirements.
How do parting lines affect your plastic threads?
Parting lines are inevitable in injection molding and will typically run lengthwise down the center of external threads. On your plastic threads, this line can create a microscopic “step” or flash that might interfere with smooth engagement.
If the mold is not perfectly aligned, this mismatch can cause the thread to bind. Professional molders minimize this by using high-precision centering features in the tool.
Can you hide the parting line?
While you can’t completely eliminate the parting line, you can design “flats” on the sides of the thread where the mold halves meet. This “half-thread” design ensures that any flash occurs on a flat surface rather than on the thread crest.
Check this out:
- Flats prevent the nut from catching on the parting line.
- They make the mold easier to manufacture and maintain.
- Strength is slightly reduced, but reliability is greatly increased.
What about flash in the threads?
Excessive flash in the thread area can prevent the mating part from fully seating. This is usually caused by worn mold seals or improper clamping pressure during the injection cycle.
Wait, there’s more:
- Tight tolerances at the parting line are critical.
- Regular mold maintenance prevents flash buildup.
- Parting line placement affects aesthetic quality.
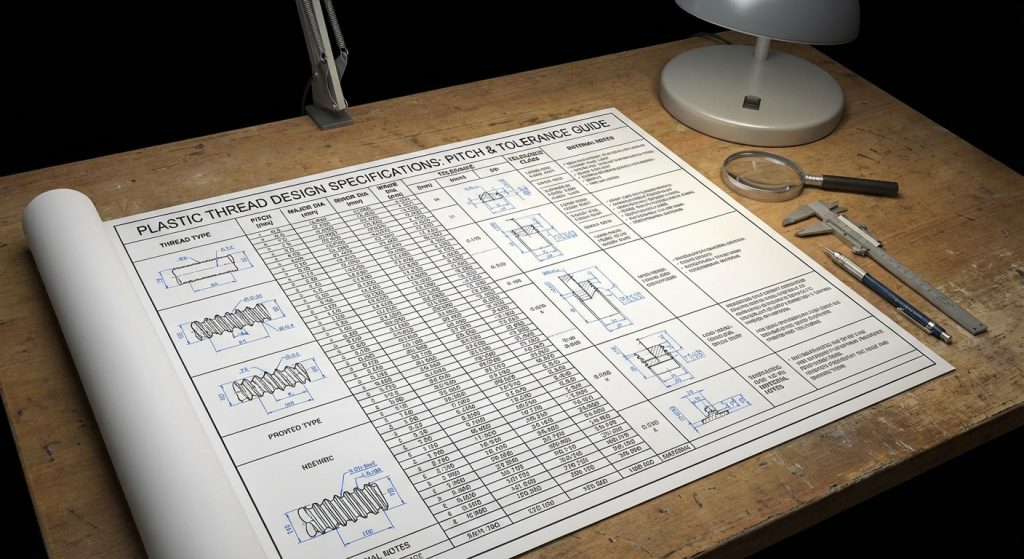
Key Takeaway: Managing parting line placement through the use of flats is the most effective way to ensure smooth thread engagement.
| Issue | Impact | Mitigation | |
|---|---|---|---|
| Mismatch | Binding | Precision alignment pins | |
| Flash | Poor fit | Clamping pressure control | |
| Visibility | Aesthetics | Hidden parting line design |
The table summarizes the risks associated with parting lines and the technical steps used to negate their impact.
When should you use inserts for plastic threads?
Consider metal inserts when the assembly load, service life, or repeated disassembly exceeds what the molded plastic thread can support. The insert material, retention geometry, molding process, and corrosion requirements should be reviewed together.
Molded-in threads are great for single-use or permanent assemblies, but they can’t match the cycle life of a brass or stainless steel insert.
Why choose metal overmolding?
Metal overmolding involves placing a threaded component into the mold before injection. The plastic then flows around the insert, locking it into the part’s structure for maximum pull-out resistance.
The reality is:
- Metal threads handle much higher torque than plastic.
- They are ideal for medical or automotive applications.
- This process eliminates the need for secondary tapping operations.
Are hand-loaded inserts viable?
For internal plastic threads in low-volume production, hand-loaded inserts (also known as “loose pieces”) are often used. These are unscrewed manually from the part after it is ejected from the mold.
Watch out for these:
- They significantly increase the cycle time.
- Labor costs per part will be higher.
- They are limited to two or three inserts per part.
Key Takeaway: Metal inserts are the gold standard for high-cycle durability, while hand-loaded inserts offer a cost-effective path for low-volume plastic threads.
| Insert Type | Durability | Production Speed | |
|---|---|---|---|
| Molded-in Metal | Very High | Fast | |
| Hand-loaded Plastic | Low | Slow | |
| Heat-Staked Metal | High | Moderate |
This selection guide helps you choose the right fastening technology based on your part’s expected lifespan and assembly frequency.
What are the best materials for plastic threads?
The choice of resin is critical because shrinkage and lubricity directly impact how well your plastic threads perform. Semi-crystalline resins are generally preferred for threaded applications due to their toughness and natural resistance to wear.
Nylon, POM (Acetale), and Polypropylene are among the most common choices. Each has unique shrinkage rates that must be accounted for in the mold design to ensure the final threads meet the required dimensions.
Is Nylon the right choice?
Nylon is exceptionally strong and has high impact resistance, making it perfect for functional fasteners. However, it is hygroscopic, meaning it absorbs moisture, which can cause the threads to swell over time.
Think about this:
- Nylon offers excellent chemical resistance.
- It is naturally self-lubricating for easier assembly.
- Glass-filled grades offer even higher stiffness.
Why is POM used for precision?
POM, or Delrin, is often the preferred material for precision threads because it has very low moisture absorption and high dimensional stability. It provides a “slippery” surface that allows for very smooth threading action.
It gets better:
- POM maintains its strength over a wide temperature range.
- It resists “creep,” meaning the threads won’t deform under long-term load.
- It has a high fatigue endurance limit.
Key Takeaway: Selecting a semi-crystalline material like POM or Nylon provides the necessary wear resistance and strength for functional threads.
| Material | Key Advantage | Major Drawback | |
|---|---|---|---|
| Nylon (PA) | High Strength | Moisture absorption | |
| POM (Acetal) | Dimensional stability | High shrinkage rate | |
| Polypropylene | Low cost | Lower shear strength |
Understanding these material trade-offs is essential for ensuring that your threads remain functional throughout the product’s life cycle.
Are there better alternatives to plastic threads?
In some designs, alternatives such as self-tapping screws, heat-stake inserts, or snap features may be more suitable than a molded thread. Compare assembly load, service cycles, wall thickness, automation, and repair requirements before choosing.
If your part volume is low, machining the threads as a secondary operation might be more cost-effective than building a complex unscrewing mold.
Should you use self-tapping screws?
Self-tapping screws create their own threads as they are driven into a pre-molded hole (boss). This eliminates the complexity of molding internal threads and is the standard for consumer electronics.
Here’s why:
- It significantly reduces tooling costs.
- Assembly is simplified for high-speed lines.
- It allows for much smaller fastener diameters.
When to use ultrasonic inserts?
Ultrasonic or heat-staked inserts are metal components pressed into a molded hole using heat or vibration. This melts the surrounding plastic, which then re-solidifies around the insert’s knurling.
Consider the following:
- This is the most reliable way to add metal threads to plastic.
- It allows for high torque and repeated assembly.
- It is very easy to automate in a production environment.
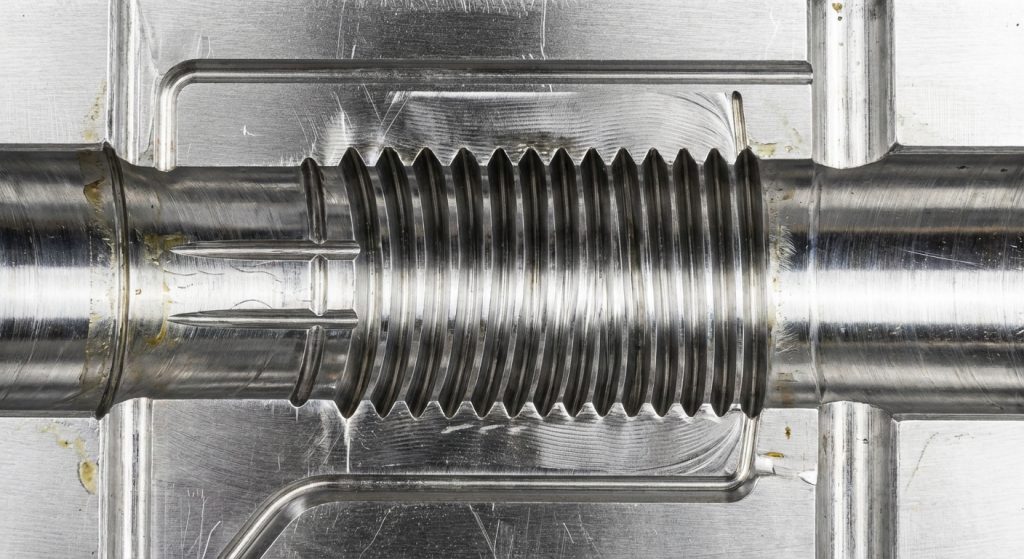
Key Takeaway: Alternatives like self-tapping screws or post-mold inserts can offer better performance and lower tooling costs than molded-in threads.
| Alternative | Best For | Tooling Impact | |
|---|---|---|---|
| Self-Tapping | One-time assembly | None (Simple hole) | |
| Heat-Stake | High durability | Minimal | |
| Machined Threads | Low volume | None (Secondary) |
The table above illustrates the strategic advantages of choosing alternative fastening methods over traditional molded threads.
How do you design bosses for plastic threads?
A boss is the cylindrical feature that houses the thread, and its design is just as important as the thread itself. To support your plastic threads effectively, the boss must have enough wall thickness to prevent bursting during screw insertion.
A common mistake is making the boss walls too thick, which leads to “sink marks” on the outer surface of the part. This occurs because thick sections cool slower than the surrounding walls.
What is the ideal boss thickness?
Boss wall thickness should be sized relative to the nominal wall, resin, rib support, assembly load, and appearance requirements. Thick transitions can increase sink and cooling risk.
Don’t forget:
- Adding gussets or ribs to the base of the boss increases stability.
- Internal radii at the base prevent stress fractures.
- Set draft from resin, texture, depth, thread geometry, and the selected extraction method.
How do you prevent sink marks?
To prevent sink marks on the show surface, you can “core out” the base of the boss or use a recessed design. This ensures that the material volume remains consistent throughout the part.
Keep this in mind:
- Uniform wall thickness is the golden rule of molding.
- Ribs can provide strength without adding bulk.
- Proper cooling channel placement in the mold is vital.
Key Takeaway: Size bosses and supporting ribs from molding behavior, assembly load, nominal wall, and appearance requirements, then validate the design.
| Feature | Design Basis | Purpose | |
|---|---|---|---|
| Wall Ratio | Set from nominal wall, resin, load, and appearance requirements | Manage strength, cooling, and sink risk | |
| Draft Angle | Set from resin, texture, depth, and extraction method | Support release while preserving geometry | |
| Support | Size ribs or gussets for the application | Support required stiffness |
Use these points as design-review inputs, then validate the housing against molding trials, assembly loads, dimensional requirements, and appearance criteria.
What best practices ensure quality plastic threads?
Successful plastic threads require design rules that reflect resin flow, shrinkage, ejection, and assembly. A lead-in chamfer can help guide the mating part and reduce cross-threading risk.
Furthermore, you should avoid “feather edges” at the end of the thread. These thin sections of plastic are incredibly fragile and will likely break off during the first assembly attempt.
Why are draft angles essential?
Draft on split-mold thread surfaces should be selected from the resin, texture, feature depth, parting strategy, and acceptable thread geometry. Unscrewing threads require a different extraction review.
Here is the secret:
- Draft reduces friction and prevents “galling” of the plastic.
- It extends the life of the mold by reducing wear.
- Parts with draft are less likely to stick in the cavity.
How to manage thread termination?
Threads should never simply “stop” at a flat surface; they should be recessed or ended with a specific radius. This ensures that the mold steel is robust and that the part has a clean finish.
Think about it:
- Recessed threads protect the first turn from damage.
- It provides a cleaner aesthetic for the final product.
- Mold maintenance becomes significantly easier.
Key Takeaway: Implementing draft angles and proper thread termination prevents manufacturing defects and improves end-user assembly experience.
| Best Practice | Recommendation | Reason to Evaluate | |
|---|---|---|---|
| Lead-in | Chamfer sized for the mating part | Assembly guidance | |
| Draft Angle | Set for resin, depth, and extraction | Release and thread form | |
| End Point | Recessed or radiused termination | Mold steel and part edge condition |
Small geometry changes can affect moldability and assembly, but their effect on yield and quality should be verified through project-specific analysis and trials.
How does WOKE Molds optimize your plastic threads?
WOKE Molds can review molded-thread geometry as part of engineering and DFM, including draft, wall thickness, parting, gate and runner, ejection, cooling, shrinkage, tolerance, and material considerations.
Manufacturing and inspection planning are defined from the drawing, thread geometry, resin, tooling method, and critical characteristics. Equipment and process capabilities are selected for the project; no single finished-part tolerance or perfect engagement result applies to every threaded component.
What does our DFM report cover?
After project launch, the formal DFM and technical review scope is confirmed for the part and mold. It may cover thread geometry, draft, parting, gating, cooling, ejection, shrinkage, tolerance, and material risks relevant to the project.
Here’s how we help:
- We identify areas where draft is insufficient.
- We suggest material alternatives to reduce shrinkage.
- Our team optimizes the mold cooling to reduce cycle times.
How do we ensure thread accuracy?
Inspection is planned from the drawing and critical characteristics. CMM or other appropriate methods can be arranged where the geometry and project require them; the inspection scope and reports are not identical for every production run.
Wait, there’s more:
- EDM planning and electrode strategy are selected according to the mold geometry and manufacturing process.
- T1 timing is confirmed after the mold design, materials, mechanisms, and validation scope are reviewed.
- Process and inspection controls are defined according to the customer and project requirements.
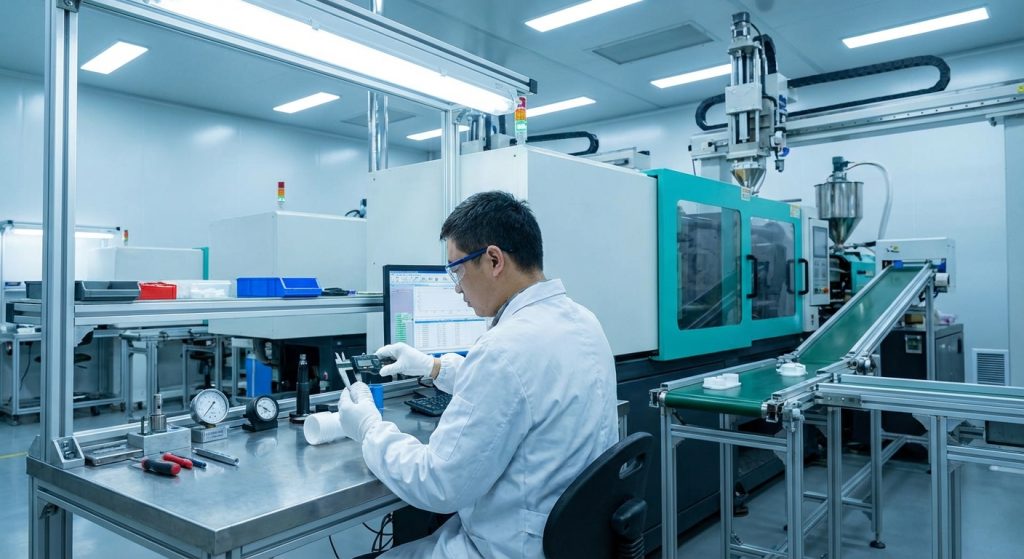
Key Takeaway: Molded-thread projects benefit from coordinated part design, tooling, process, and inspection planning against the drawing and assembly requirements.
| Project Area | Basis | Expected Output | |
|---|---|---|---|
| Precision | Drawing and critical dimensions | Project-specific tolerance and inspection plan | |
| Quality | Customer and application requirements | Defined controls and records as required | |
| Schedule | Tool complexity and validation scope | Quoted project milestones |
Choosing a manufacturer with advanced engineering support ensures your project moves from design to production without costly delays.
Elevate Your Design with WOKE Molds
Threaded components require coordinated review of geometry, material, extraction method, mold construction, process, and inspection. WOKE Molds supports project-specific DFM and mold engineering for these decisions. To discuss a threaded part or an unscrewing injection mold, contact our engineering team with the drawing, resin, volume, and assembly requirements.
Frequently Asked Questions
Can I mold threads without using an unscrewing motor?Yes, you can. For external threads, a simple two-plate mold with the parting line running through the center of the threads is the most cost-effective method. For internal threads, you can use collapsible cores or manual inserts, though these may impact your cycle time or tooling budget.
What is the smallest diameter recommended for molded internal threads?There is no universal minimum. Review the thread form, core strength, steel, resin, molding conditions, extraction method, inspection access, and required tool life before setting the diameter.
How do I prevent the plastic threads from stripping during assembly?The best way is to use a coarse thread pitch and a rounded profile. Additionally, selecting a tough, semi-crystalline material like Nylon or POM significantly increases the shear strength of the threads compared to amorphous resins like ABS or Polycarbonate.
Should I use glass-filled materials for threaded parts?It depends on your goals. While glass fibers increase stiffness and strength, they also make the material more abrasive, which can wear down the mold steel faster. Glass-filled resins also have non-uniform shrinkage, which can make it harder to maintain tight thread tolerances.
What is the typical lead time for a threaded injection mold?Lead time is quoted by project. Thread extraction, cavitation, steel, hot-runner and cooling systems, surface requirements, and validation scope can all affect the schedule; the documented general mold range is typically 4–8 weeks.