
11 injection molding defects and troubleshooting
Solving injection molding defects involves a systematic analysis of machine settings, material properties, and mold design to evaluate part quality against defined criteria. You likely face the frustration of high scrap rates and delayed production cycles due to unexpected cosmetic or structural flaws. These defects don’t just waste material; they erode your profit margins and damage your reputation for precision. By implementing robust mold-venting checks protocols, you can transform these production hurdles into opportunities for process optimization and improved yield.
1. How do you resolve short shots using injection molding troubleshooting?
For a short shot, first confirm the symptom and inspect material feed, shot size, non-return-valve behavior, fill profile, actual melt and mold temperatures, gate and runner restrictions, wall thickness, and venting. Change one variable at a time within the grade and machine limits. Short shots occur when the plastic melt fails to reach the furthest extremities of the mold, leaving the part incomplete. Effective injection molding troubleshooting requires checking for flow restrictions like undersized runners or thin walls.
Adjusting Pressure and Melt Heat
Increasing the machine’s injection speed can help force material through narrow sections before it solidifies. But wait, there’s more to consider regarding your equipment.
- Increase injection pressure limits.
- Raise barrel temperature settings.
- Inspect the non-return valve for wear.
Examining Mold Ventilation
Insufficient venting can trap air inside the cavity and oppose filling. Inspect and document the vent locations, cleanliness, and condition before changing process settings; the mold-venting checklist covers the tooling checks in more detail.
- Clean blocked ventilation channels.
- Increase the number of vent locations.
- Verify the feed throat is not obstructed.
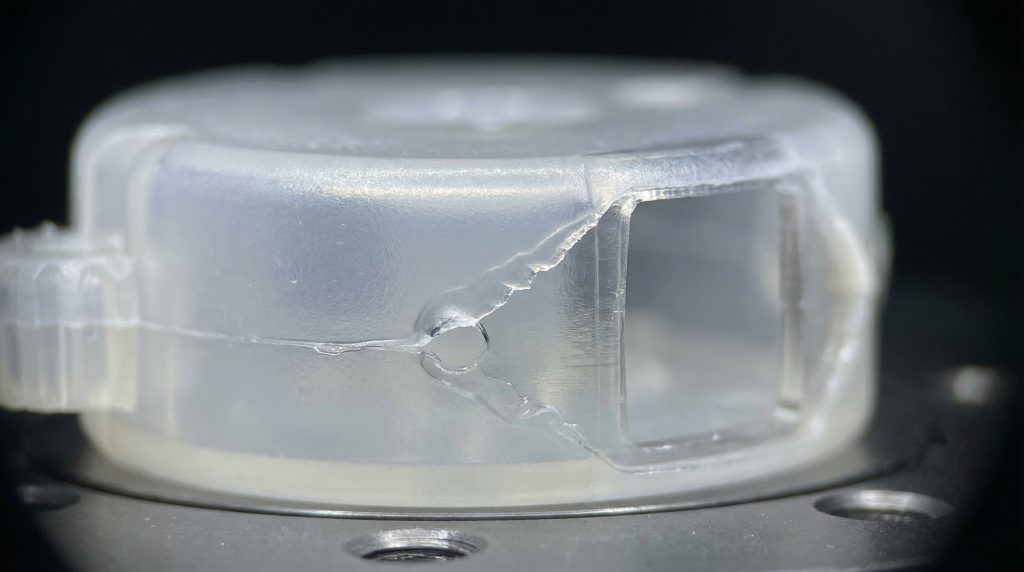
Key Takeaway: Short shots are primarily driven by insufficient pressure or flow resistance, necessitating a check of both machine parameters and mechanical integrity.
| Potential Cause | Solution | Metric to Monitor | |
|---|---|---|---|
| Low Injection Pressure | Increase pressure settings | Peak pressure (bar) | |
| Cold Melt Temp | Raise barrel temperatures | Melt temp (°C) | |
| Poor Venting | Clean or add vents | Cycle consistency |
Use the table as a diagnostic checklist; the acceptable settings depend on the grade, tool, machine, geometry, and validated process window.
2. What steps prevent flash in injection molding troubleshooting?
Flash appears where melt escapes at a parting line, insert, or vent. Check the tool condition, contamination, alignment, projected area, material viscosity, and actual cavity pressure before changing clamp force or injection settings; excessive clamp force can also damage tooling. Validate the correction on the affected cavity and feature.
Clamping Force Optimization
The clamping force must be strong enough to resist the high pressure of the injected melt. Think about this for a second before you ramp up production.
- Calculate required tonnage based on part area.
- Verify the machine’s current clamp setting.
- Reduce injection speed to lower cavity pressure.
Parting Surface Integrity
Flash often indicates a physical gap caused by worn tooling or foreign debris. But that’s not all that can go wrong with your surfaces.
- Clean the mold parting line thoroughly.
- Check for deformed mold plates or structures.
- Inspect for foreign material stuck on the tool.

Key Takeaway: Preventing flash requires a delicate balance between external clamping power and internal material viscosity.
| Potential Cause | Solution | Metric to Monitor | |
|---|---|---|---|
| Low Clamp Force | Increase clamp tonnage | Tonnage (T) | |
| High Melt Temp | Lower barrel heat | Viscosity index | |
| Worn Mold Line | Repair or resurface mold | Parting line gap |
Tool cleanliness and appropriate clamp setup are two checks in a flash investigation; also inspect parting surfaces, alignment, wear, projected area, material viscosity, and actual cavity pressure, then verify the result.
3. How can sink marks be ended with injection molding troubleshooting?
Sink marks are surface depressions associated with local shrinkage, often near thick sections, ribs, or bosses. Review wall geometry, gate freeze behavior, packing, and cooling as interacting variables rather than increasing pressure or time by default. See the focused sink-mark troubleshooting guide for a structured diagnosis.
Pack and Hold Control
Gate-freeze behavior should be established for the actual grade, gate, geometry, and process; set the hold profile from a documented study rather than a universal rule. Now, consider the alternative if you ignore these settings.
- Increase packing pressure duration.
- Raise the holding pressure magnitude.
- Enlarge gates to delay gate freeze.
Cooling Cycle Adjustments
Insufficient cooling time allows the internal heat to pull the surface inward after ejection. It doesn’t stop there when dealing with thick geometries.
- Extend the overall cooling time.
- Lower the mold water temperature.
- Review wall-thickness transitions, ribs, and bosses against the sink-risk criteria.
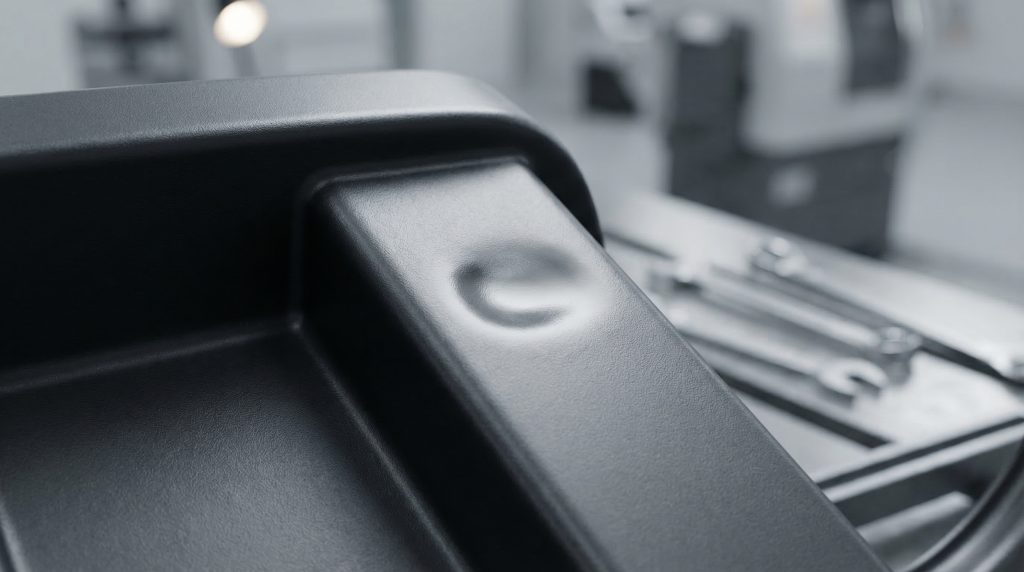
Key Takeaway: Sink marks are the physical manifestation of internal thermal shrinkage, solved by better packing and cooling management.
| Potential Cause | Solution | Metric to Monitor | |
|---|---|---|---|
| Short Hold Time | Extend hold phase | Gate freeze time | |
| High Mold Temp | Increase cooling flow | Mold surface temp | |
| Thin Gates | Enlarge gate diameter | Flow rate (cc/s) |
A controlled cooling study can show whether temperature balance contributes to the observed sink; verify the surface against the defined cosmetic standard.
4. Can splay marks be cured via injection molding troubleshooting?
For splay, inspect resin identity and supplier drying guidance, measured moisture, storage, contamination, residence time, decompression, back pressure, screw speed, and actual melt temperature. Drying or speed changes are conditional tests, not guaranteed cures. These silver streaks are typically caused by steam or trapped volatiles within the melt during the injection cycle. Reliable resin preparation and selection starts with strict material handling and moisture control.
Material Preparation
The most frequent culprit for splay is residual moisture within the raw plastic pellets. But that’s not all you need to watch in the hopper.
- Dry material per manufacturer specs.
- Check desiccant dryer performance.
- Avoid mixing regrind with high moisture.
Shear Heat Reduction
High injection speeds and excessive screw RPMs generate gas due to friction and shear. Believe it or not, speed can be your enemy here.
- Reduce injection speed settings.
- Lower the back pressure slightly.
- Decrease the barrel temperature.
Key Takeaway: Splay can be associated with moisture, trapped gas, contamination, degradation, or shear. Confirm the resin supplier’s conditioning and processing guidance, then isolate variables.
| Potential Cause | Solution | Metric to Monitor | |
|---|---|---|---|
| Moist Resin | Use a desiccant dryer | Dew point (°C) | |
| High Screw RPM | Reduce plasticizing speed | Screw recovery time | |
| Excessive Heat | Lower barrel profile | Melt temperature |
Eliminating moisture is the fastest way to remove the “silver streak” appearance from your high-precision parts.
5. How is warpage solved through injection molding troubleshooting?
You correct warpage by balancing the cooling rate across all part sections and ensuring the material is rigid before ejection. Warpage is the result of uneven internal stresses caused by differential cooling between different areas of the molded part. Scientific injection molding troubleshooting requires fine-tuning the mold temperature to achieve thermal equilibrium.
Cooling Channel Balance
The cooling must be consistent across both the core and cavity sides of the tool. It gets even more critical with complex geometries.
- Verify cooling water flow rates.
- Adjust core and cavity temp separately.
- Check for scale buildup in channels.
Prolonging Ejection Cycles
If ejection contributes to warpage, review part temperature and stiffness at ejection, cooling balance, draft, pin layout, ejection force, and geometry; confirm any change by dimensional measurement after the defined conditioning time.
- Increase the cooling time.
- Reduce the melt temperature.
- Slow down the ejection speed.
Key Takeaway: Warpage is driven by internal stress, which is best managed by uniform cooling and sufficient solidification time.
| Potential Cause | Solution | Metric to Monitor | |
|---|---|---|---|
| Unbalanced Cooling | Adjust water manifold | ΔT (Temp Delta) | |
| Early Ejection | Increase cooling cycle | Part rigidity | |
| High Pack Stress | Lower packing pressure | Mold flow analysis |
Balancing mold temperatures can reduce one source of differential shrinkage, but dimensional stability must be verified for the actual geometry, grade, fiber orientation, process window, conditioning, and measurement method.
6. What ends burn marks in injection molding troubleshooting?
For burn marks, distinguish trapped-gas heating from material degradation, excessive residence time, shear, contamination, or heater-control issues. Inspect venting and actual process data before changing temperature or fill speed. Burn marks often appear at the end of fill locations where air is trapped and compressed until it reaches ignition temperatures. Strategic venting-focused troubleshooting involves optimizing the air evacuation process to protect material integrity.
Preventing Air Traps
Compressed air, known as “dieseling,” is the primary cause of black or rust-colored stains. Here is the kicker you need to remember.
- Clean existing mold vents.
- Add additional venting at burn sites.
- Reduce the injection speed at end-of-fill.
Controlling Melt Degradation
Excessive heat in the barrel can cause the polymer chains to break down and burn. But that’s not all that creates thermal stress.
- Lower the nozzle temperature.
- Reduce screw back pressure.
- Check the barrel for hot spots.
Key Takeaway: Burn marks are local combustion events or thermal degradation, solved by better venting and lower temperatures.
| Potential Cause | Solution | Metric to Monitor | |
|---|---|---|---|
| Trapped Air | Increase venting depth | Vent gas flow | |
| High Speed | Slow down final fill | Fill time (s) | |
| Overheating | Calibrate temp controllers | Barrel thermocouples |
After a change, inspect the surface and, where degradation matters, verify the relevant material or part property using the agreed test; process adjustment alone does not prove property retention.
7. How are voids handled by injection molding troubleshooting?
You resolve voids by increasing the packing pressure to fill internal shrinkage and ensuring the resin is properly dried. Voids are vacuum pockets that form inside the part wall when the exterior cools faster than the interior. Thorough injection molding troubleshooting focuses on forcing more material into the cavity to compensate for this thermal contraction.
Fixing Interior Shrinkage
Thick sections are most susceptible to voids as the outer skin solidifies first. You might be wondering why this happens so often.
- Increase pack and hold pressures.
- Extend the holding time duration.
- Lower the melt temperature.
Gas Evacuation Techniques
Unlike voids, bubbles are caused by trapped gas or moisture that hasn’t been evacuated. Let’s look at the best ways to stop this.
- Increase the back pressure.
- Verify the resin drying cycle.
- Slow the injection speed.
Key Takeaway: Voids are vacuum-driven gaps while bubbles are gas-driven; both require better packing and material prep.
| Potential Cause | Solution | Metric to Monitor | |
|---|---|---|---|
| Low Pack Pressure | Increase packing force | Cushion size (mm) | |
| High Melt Temp | Lower the heat profile | Cooling rate | |
| Thick Sections | Redesign for thin walls | Wall thickness |
Cushion repeatability is one diagnostic input for voids. Also review geometry, gate freeze, packing, cooling, moisture or gas, and the inspection method before selecting a correction.
8. What stops jetting during injection molding troubleshooting?
Jetting can occur when a melt stream enters an open cavity without attaching to a surface. Review gate type and location, initial fill profile, melt and mold conditions, and the observed flow pattern; sample any gate or process change and compare the surface to the acceptance standard.
Strategic Gate Placement
The material should hit a wall or pin immediately after entering the cavity to disperse the energy. Let’s dig deeper into the physics of this flow.
- Relocate gates to favor impingement.
- Use overlap or submarine gates.
- Increase the gate cross-section.
Velocity Profile Tuning
Initial fill speed can influence jetting, but the appropriate profile depends on gate design, grade, melt and mold conditions, and cavity geometry; validate the observed flow and surface.
- Use a profiled injection speed.
- Increase the melt temperature.
- Raise the mold temperature.
Key Takeaway: Jetting is a flow-pattern failure solved by breaking the melt stream or slowing its entry velocity.
| Potential Cause | Solution | Metric to Monitor | |
|---|---|---|---|
| High Velocity | Reduce initial speed | Injection profile | |
| Poor Gate Spot | Relocate for impingement | Flow simulation | |
| Cold Material | Increase nozzle heat | Melt viscosity |
A revised gate or fill profile may reduce the visible jetting trace; confirm the result across cavities and the validated process window.
9. How do weld lines vanish with injection molding troubleshooting?
Weld lines form where flow fronts meet. Their appearance and strength depend on grade, temperature history, venting, gate layout, flow-front speed, geometry, and contaminants. Review these variables within the supplier processing window and validate any change with the required cosmetic and mechanical tests.
Thermal Fusion Optimization
Weld-line behavior depends on the thermal and flow history, grade, venting, pressure, geometry, and contamination. Diagnose these factors within the supplier processing window rather than defaulting to higher temperature.
- Raise the barrel temperature.
- Increase mold surface temperature.
- Insulate the mold plates.
Enhancing Mold Ventilation
Air entrapment can weaken or accentuate a weld line, but strength and appearance also depend on grade, flow-front temperature and speed, pressure, geometry, and contamination. But wait, there is a venting trick you should know.
- Add vents at the weld line site.
- Increase the injection speed.
- Adjust gate locations to move the line.
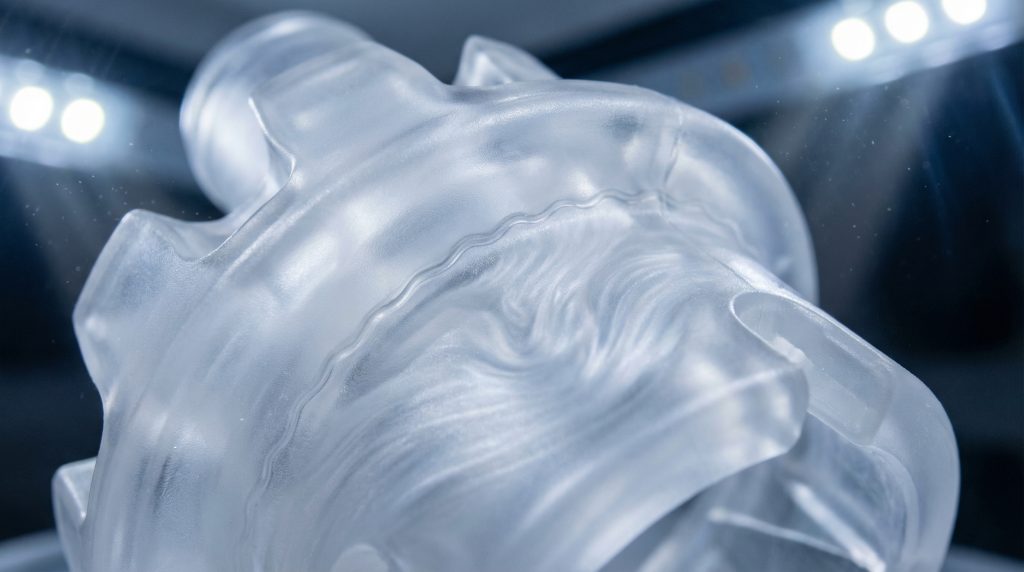
Key Takeaway: Treat a weld line as a part-specific flow-front junction. Diagnose grade, temperature history, speed, pressure, gate layout, venting, geometry, and contamination, then verify appearance and strength against the acceptance plan.
| Potential Cause | Solution | Metric to Monitor | |
|---|---|---|---|
| Cold Flow Fronts | Increase melt/mold heat | Weld line strength | |
| Slow Injection | Boost fill speed | Fill time | |
| Trapped Air | Add vents at meeting point | Visual seam depth |
Process or tooling changes may alter weld-line appearance and strength, but both outcomes require part-specific inspection and, where structural, mechanical testing at the weld line.
10. How does injection molding troubleshooting resolve gate vestige?
Gate vestige is residual material at the entry point that may affect assembly or appearance. Review gate type and condition, gate freeze behavior, packing, separation method, and ejection timing, then measure the result against the drawing or cosmetic limit.
Pressure Profiling
The transition from injection to holding pressure must be timed to avoid over-packing the gate. That’s just the beginning of the adjustment process.
- Lower the hold pressure.
- Reduce the hold time duration.
- Adjust the decompression (suck-back).
Gate Design Refinement
The physical shape of the gate determines how easily it shears off during ejection. But there is more to consider regarding tool maintenance.
- Sharpen the gate edges.
- Use a smaller gate orifice.
- Switch to a self-shearing gate type.
Key Takeaway: Gate vestige is a mechanical separation issue solved by pressure timing and gate geometry refinement.
| Potential Cause | Solution | Metric to Monitor | |
|---|---|---|---|
| Over-packing | Lower hold pressure | Part weight (g) | |
| Dull Gate | Sharpen or replace insert | Vestige height (mm) | |
| High Melt Temp | Lower nozzle temperature | Stringing tendency |
Gate changes should be sampled and the vestige measured against the drawing or approved cosmetic limit; secondary trimming depends on that acceptance criterion.
Summary and Recommendations
Troubleshooting injection molding defects requires a documented sequence: define the symptom, confirm material identity and conditioning, review the tool and vents, then change one process variable at a time and verify the result against the drawing or approved sample. Results depend on the resin grade, part geometry, mold condition, machine, and acceptance criteria. For a project-specific review, contact us with the drawing, material grade, defect photos, and current process record.
Frequently Asked Questions
Can I fix splay marks without a desiccant dryer?Drying equipment and settings depend on the exact resin grade, supplier instructions, storage history, and measured moisture. Confirm those conditions before attributing splay to moisture; other causes can include trapped gas, contamination, or excessive shear.
How should an internal void or bubble be investigated?Use non-destructive inspection or a controlled sectioning plan appropriate to the part, then correlate the location with geometry, packing, cooling, moisture, and venting records. Do not treat an uncontrolled heat-gun response as a definitive classification test.
How do I know if my clamping force is too low?Directly check for flash appearing only during the high-pressure injection phase. If the parting line opens even slightly when the peak pressure is reached, your machine needs more tonnage or lower injection speed.
Can I move a weld line without changing the mold design?Process changes may shift a weld line in some tools, but the response depends on grade, gate and runner balance, geometry, venting, and the available process window. Confirm location and strength on samples; tooling changes may still be required.
What injection speed prevents burn marks?There is no universal speed. Use the material supplier’s processing window and a fill profile validated for the tool, while checking venting, trapped air, residence time, and actual melt temperature. Change one factor at a time and record the result.
For production support, explore our plastic injection molding service. You can also share your drawing for an engineering review.