
Valve Gate Injection Molding: Sequencing and Shutoff
Valve gate injection molding uses a hot runner nozzle with a moving pin that opens and closes the gate mechanically. Because the gate is shut by the pin, not by freezing plastic, it leaves a clean, flat gate mark and gives precise control over when each gate opens. It is the standard choice for cosmetic parts, large parts with several gates and multi-cavity molds that need balanced filling.
That control only works when the tool is designed and validated for it. For example, a bumper-style part with three gates can still show a weld line if the valve sequence is wrong. In a multi-cavity mold, one sticking pin can short-shot one cavity while the others look normal. In this guide, we explain valve gate injection molding, including needle sequence, shutoff, gate witness, multi-cavity sequence validation and maintenance. For the wider runner choice, see our guide to hot runner vs cold runner molds.
Valve gate injection molding is hot runner molding in which a needle (valve pin) driven by a pneumatic, hydraulic or electric actuator opens and closes each gate. It gives a clean gate witness, larger gate sizes without stringing, and sequential (cascade) control of several gates to move or remove weld lines. Key design points are pin alignment and shutoff fit, actuator choice, sequence timing, cooling around the gate and access for pin and seal service. In multi-cavity molds, pin timing and fill must be validated for every cavity.
In short: valve gates give clean gates and controlled filling, if pin shutoff, sequence and service are designed and validated.
Key points:
- Clean gate: the pin closes the gate flush with the part.
- Sequence: gates open in a planned order.
- Validation: check timing and fill for every gate and cavity.
What Is Valve Gate Injection Molding?
Valve gate injection molding is a hot runner method in which each nozzle has a valve pin that seals the gate. The pin opens to let melt flow and closes when filling and packing are complete.
Main components:
- Hot runner manifold and nozzles, heated to keep the melt molten
- Valve pins, which open and close the gates
- Actuators, pneumatic, hydraulic or electric
- Controller, for heater zones and valve timing
- Gate insert, where the pin seals against the steel
For example, a high-gloss appliance cover often uses a single valve gate on the back face, so the visible face shows no gate mark at all. Hot runner systems from established suppliers such as YUDO, Mold-Masters, HASCO or Synventive are used per customer requirement in our injection mold manufacturing projects.
Key Takeaway: Valve gates move gate control from the plastic to the machine. That gives more control, and more to maintain.
When Is Valve Gate Injection Molding the Right Choice?
Valve gate injection molding is the right choice when gate appearance, flow control or material use justify the extra tool cost.
Use valve gates for:
- Cosmetic parts where a gate vestige is not acceptable
- Large parts with several gates, to control weld lines
- Multi-cavity molds that need balanced, repeatable fill
- Thick gates that would string or drool with open nozzles
- Fast cycles, where gate freeze would limit hold time
On the other hand, valve gates are often unnecessary for small, non-cosmetic parts in low volume. In those cases, a cold runner or open hot tip is simpler. Our guide to injection molding gate types compares the options.
Key Takeaway: Pay for valve gates when the gate mark, weld line or fill balance is a real requirement.
How Does Needle Sequence Control Work in Valve Gate Injection Molding?
Needle sequence control works by opening each valve gate at a set time or screw position, so the flow front moves across the part in a planned order. This is called sequential or cascade valve gating.
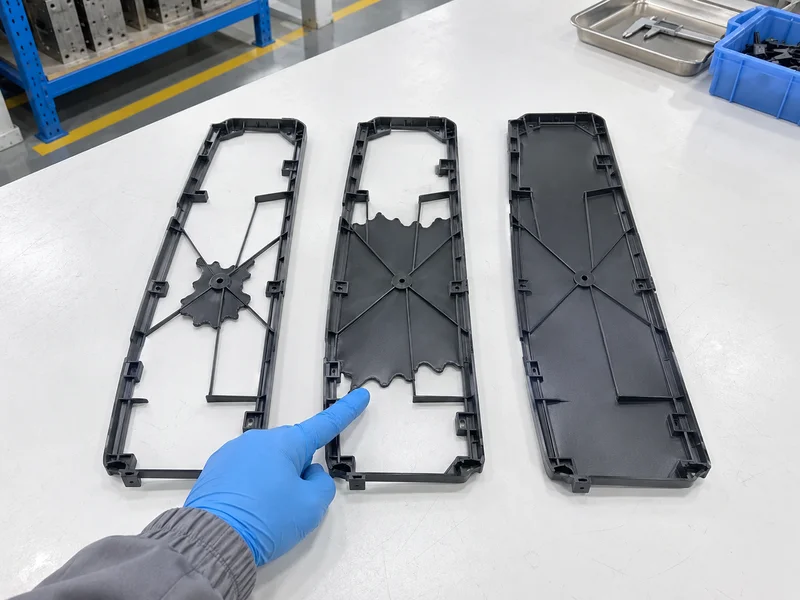
A typical cascade:
- Gate 1 opens at the center and starts filling.
- Gate 2 opens when the flow front passes it.
- Gate 3 opens when the flow front passes it.
- Gates close at the end of hold, often in a set order.
Because each new gate opens behind the flow front, there is no meeting of two fronts, so the weld line is avoided. For example, a long door panel filled by three gates can be molded without a visible weld line using this method. Our guide to weld lines explains the defect.
Key Takeaway: Triggering by screw position is more repeatable than by time. Ask which method the tool uses.
How Should Valve Gate Shutoff Be Designed?
Valve gate shutoff should be designed so the pin seals the gate cleanly every shot, without wear or flash.
Design points:
- Pin and gate alignment: concentric guiding, often with a cylindrical shutoff
- Gate insert steel: hardened, sometimes replaceable
- Pin tip: flush with or slightly recessed into the part surface
- Thermal expansion: the manifold grows when hot, so the pin must align at operating temperature
- Cooling: good cooling around the gate insert for a clean witness
For example, a pin that is guided only at the actuator end can tilt slightly and wear the gate. As a result, a small ring of flash appears around the gate. Cylindrical guiding near the tip prevents it.
Key Takeaway: Ask how the pin is guided at the tip. Pin alignment decides gate life.
What Should the Gate Witness Look Like?
The gate witness in valve gate injection molding should be a small, flat or slightly raised circle, matching the pin diameter, without strings or flash.
Common gate witness problems:
- Raised ring: pin closes late or worn gate land
- Dull or matte spot: gate area too hot or cooling poor
- Stringing: pin not fully closed or melt temperature too high
- Pin mark too deep: pin travel or position wrong
- Blush near the gate: injection speed too high at gate opening
Agree the acceptable gate witness at the start, for example as a maximum height and diameter on the drawing. Then inspect it at each trial. Surface appearance standards, such as gloss measurement methods from ISO, can support cosmetic criteria.
Key Takeaway: Define gate witness limits on the drawing. “Clean gate” alone is open to argument.
How Do You Validate Valve Gate Sequence in a Multi-Cavity Mold?
You validate valve gate sequence in a multi-cavity mold by proving that every pin opens, closes and fills its cavity the same way.
Validation steps:
- Pin movement check: each pin opens and closes fully, without sticking
- Short-shot study: partial fills show whether cavities fill evenly
- Part weight per cavity: weights within a set range
- Gate witness per cavity: each gate inspected
- Temperature map: each nozzle zone at set temperature
- Repeat check: results stable over a run, not only one shot
For example, in an 8-cavity valve-gated mold, one cavity with a lighter part weight may point to a slow pin or a cool nozzle. Adjusting that zone balances the mold. Our guide to multi-cavity injection molding explains balance checks in more detail.
Key Takeaway: Request per-cavity weight and gate witness results with the trial report.
How Do You Maintain Valve Gate Systems?
You maintain valve gate injection molding systems by checking pins, seals, actuators and heaters on a planned schedule.
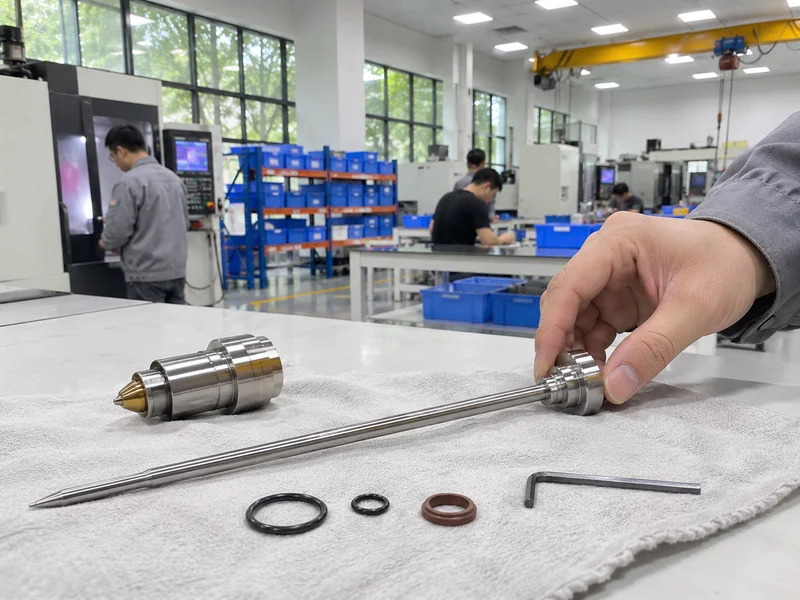
Maintenance items:
- Pin wear and tip shape
- Actuator seals and air or oil leaks
- Heater and thermocouple function for each zone
- Gate insert wear and flash around the gate
- Cleanliness of the valve area during color or material changes
For example, a slow pin can be caused by a worn actuator seal rather than the pin itself. Replacing seals early keeps the sequence stable. Our guide to mold maintenance explains preventive checks, and paid spare parts, such as pins and heaters, are available on request.
Key Takeaway: Keep spare pins, seals and heaters for critical valve-gated molds. Downtime costs more than spares.
FAQ
- Q: What is valve gate injection molding?
- It is hot runner molding where a valve pin opens and closes each gate mechanically.
- Q: Why use a valve gate instead of a hot tip?
- For a cleaner gate mark, larger gates without stringing and controlled sequential filling.
- Q: What is sequential valve gating?
- Opening gates one after another as the flow front passes, to remove or move weld lines.
- Q: What causes flash around a valve gate?
- Usually pin misalignment, a worn gate land or late pin closing.
- Q: How do you check a multi-cavity valve gate mold?
- By checking pin movement, short shots, part weight and gate witness for every cavity.
Conclusion
Valve gate injection molding gives clean gates and controlled filling when the pin shutoff, sequence and maintenance are designed and validated together. Define the gate witness, validate every cavity and plan service access. To review a valve-gated mold, send your 3D model and 2D drawing to our engineers.