
Mold Texture: Methods, Standards and Draft Requirements
Mold texture is the pattern applied to the cavity surface of an injection mold so molded parts come out with a matte, grained, leather-like, geometric or frosted finish. Texture hides flow marks, sink, scratches and fingerprints, improves grip and gives products a consistent look. On small and medium consumer, electronic and industrial housings, texture is often the most visible quality feature.
Texture must be planned with part design, draft and material from the start. For example, a deep textured wall with only 1° draft may drag and scuff on ejection, while the same texture with 3° draft releases cleanly. In this guide, we explain mold texture: main texture types, VDI and SPI standards, draft requirements, how texture interacts with materials and gloss, texture approval and maintenance, and how to specify it. For polished finishes, see our guide to mold polishing.
Mold texture is applied to cavity steel by chemical etching (photo-etching), laser texturing, EDM texturing or bead/abrasive blasting. Common references include VDI 3400 EDM grades (for example VDI 18–45), SPI finish grades (A to D) and named texture-supplier patterns. Deeper textures need more draft, often about 1–1.5° extra per 0.025 mm (0.001 in) of depth on side walls. Resin, color, gloss level and molding conditions change how a texture looks, so texture is approved on molded samples against a master plaque. Specify texture name or grade, depth, gloss and areas on the drawing.
In short: choose texture early, add enough draft, approve it on molded parts and specify it precisely.
Key points:
- Methods: chemical etch, laser, EDM, blasting.
- Draft: deeper texture needs more draft.
- Approval: molded samples, not steel alone.
What Is Mold Texture?
Mold texture is a controlled surface pattern on the mold cavity that transfers to the molded part.
Purposes:
- Appearance: matte, grain, leather, geometric
- Hide defects: flow lines, sink, gate blush
- Grip: handles and buttons
- Scratch and fingerprint resistance
- Gloss control: lower gloss for a premium look
For example, a fine matte texture on a black PC/ABS housing hides small flow marks that would be visible on a polished surface. Our guide to flow marks in injection molding explains how texture helps.
Key Takeaway: Above all, texture is both a cosmetic and a defect-hiding tool.
Which Methods Create Mold Texture?
Methods that create mold texture differ in pattern freedom, consistency and cost.
| Method | Typical patterns | Notes |
|---|---|---|
| Chemical (photo) etching | Leather, grain, geometric | Classic method, many standard patterns |
| Laser texturing | Complex, repeatable, 3D patterns | Precise, digital, good on curved surfaces |
| EDM texturing | VDI grades | Made during EDM, uniform matte |
| Bead or abrasive blasting | Fine matte | Simple, less durable on steel |
For example, a VDI 24 EDM texture can be produced directly when a cavity is sinker EDM’d. Our guide to sinker EDM explains EDM textures. Laser texturing and other treatments are available through our qualified finishing suppliers.
Key Takeaway: In other words, the method affects pattern options and repeatability.
Which Mold Texture Standards Are Used?
Mold texture standards help buyers and toolmakers describe the same surface.
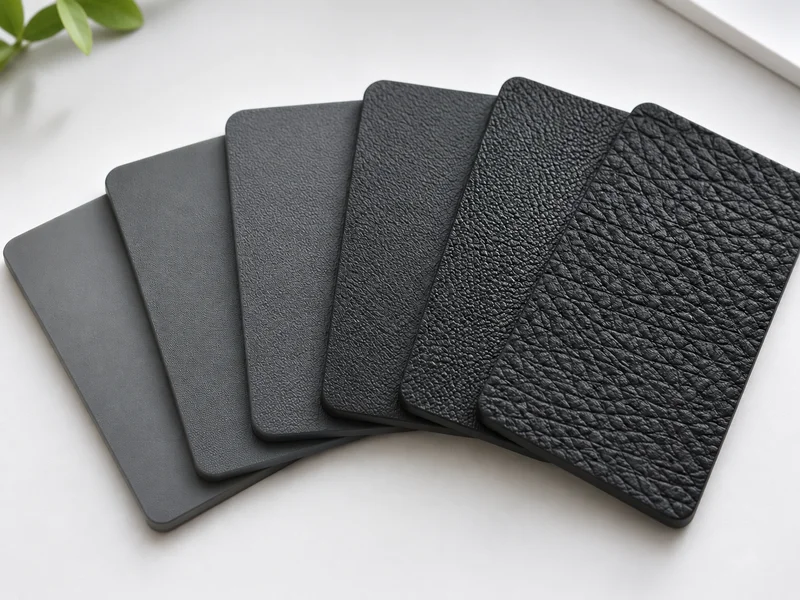
- VDI 3400: EDM texture grades from fine (VDI 12) to coarse (VDI 45)
- SPI finishes: A (polished), B (paper), C (stone), D (blasted)
- Texture-supplier patterns: named grain and leather patterns
- Master plaques: physical reference samples
For example, “VDI 27” on a drawing gives a defined EDM matte, while “SPI D-2” means a dry-blasted finish. Our guide to injection molding surface finishes compares finish standards. VDI guidelines are published by the German engineering association, and finish terms are also described in ISO surface standards.
Key Takeaway: For this reason, always name a standard or a physical master.
How Much Draft Does a Textured Surface Need?
Mold texture needs more draft than polished surfaces, because texture peaks can drag along the steel during ejection.
Guidance:
- Light textures: about 1–2° on side walls
- Medium textures: about 3° or more
- Deep textures: often about 1–1.5° extra per 0.025 mm of depth
- Follow the texture supplier’s draft chart
For example, a leather texture 0.1 mm deep on a 25 mm tall wall may need about 5° draft to avoid scuffing. Our guide to draft angle guidelines explains draft basics.
Key Takeaway: Overall, decide texture before freezing draft angles.
How Do Material and Molding Affect Mold Texture Appearance?
Material and molding affect mold texture appearance because the texture is replicated differently by each resin and process.
- Resin: PP and ABS replicate texture differently from PC
- Color: dark colors show gloss differences more
- Fillers: glass fibers can disturb fine textures
- Mold temperature: higher temperature improves replication
- Packing: affects how well plastic fills the texture
- Gloss level: changes with pressure and temperature
For example, the same texture can look glossier on a hotter mold, so the process is fixed during texture approval. Our guide to injection molding holding pressure explains packing.
Key Takeaway: Equally, approve texture with the production resin, color and process.
How Are Textured Cavities Approved and Maintained?
Mold texture is approved on molded samples and maintained by careful cleaning and protection.
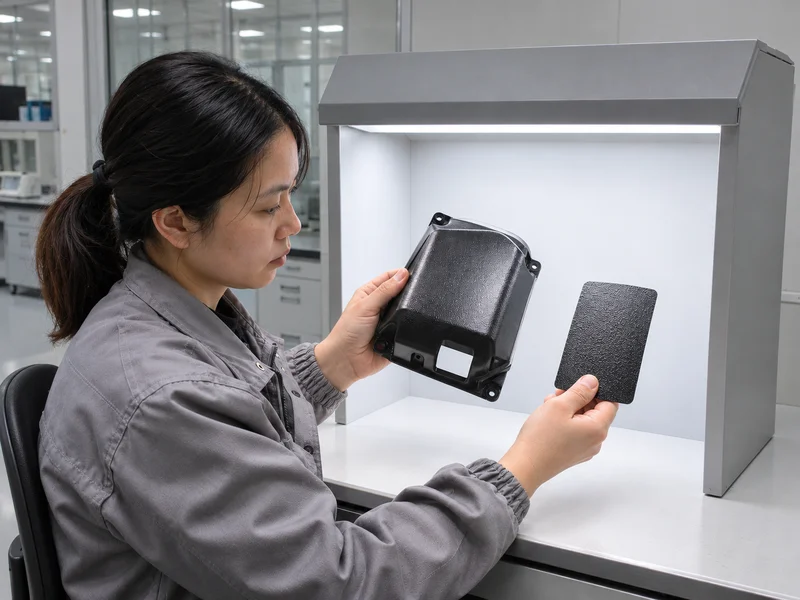
Approval:
- Texture trial on steel samples or the actual cavity
- Molded samples compared with a master plaque
- Gloss measurement if required
- Customer sign-off of boundary samples
Maintenance:
- Gentle cleaning to remove residue without damaging texture
- Avoid abrasive tools on textured areas
- Repair by re-texturing local areas when damaged
For example, a scratch in a textured cavity area may need local laser re-texturing rather than polishing. Our injection mold manufacturing team arranges texture work with specialist texturing suppliers.
Key Takeaway: As a rule, keep an approved molded sample as the long-term reference.
How Should Mold Texture Be Specified?
Mold texture should be specified on the drawing with the pattern, depth, areas and gloss.
Specification items:
- Texture name or grade, such as VDI 27 or a named grain
- Texture depth, if known
- Areas to be textured and left polished
- Draft on textured walls
- Gloss level, if required
- Master sample reference
For example, “VDI 30 on all external A surfaces, min. 3° draft on textured walls, gloss ≤ 4 GU at 60°” is clear. Our plastic injection molding service molds textured parts to approved samples.
Key Takeaway: Finally, mark textured and non-textured areas clearly.
FAQ
- Q: What is mold texture?
- A controlled surface pattern on the mold cavity that transfers to molded parts.
- Q: How is mold texture made?
- By chemical etching, laser texturing, EDM texturing or blasting.
- Q: What is VDI texture?
- A standard series of EDM texture grades, from fine to coarse.
- Q: How much draft do textured parts need?
- More than polished parts, often 3° or more depending on texture depth.
- Q: Why does the same texture look different on different parts?
- Resin, color, mold temperature and packing change replication and gloss.
Conclusion
Mold texture improves appearance and hides defects when it is chosen early, given enough draft, approved on molded parts and specified clearly. To review texture for your part, send your 3D model and 2D drawing to our engineers.