
Injection Molding Holding Pressure and Hold Time Setup
Injection molding holding pressure is the pressure applied after the cavity is filled, while the plastic cools and shrinks. It packs extra material into the cavity to compensate for shrinkage, so it directly controls part weight, dimensions, sink marks and voids. Together with holding time and screw recovery, it is one of the main levers for stable, repeatable parts.
Holding pressure is often set by trial and error, which leaves parts sensitive to small changes. For example, a part may pass dimensions at one holding pressure but show sink marks after a resin lot change, because the gate froze before packing was complete. In this guide, we explain injection molding holding pressure: what it does, how to set pressure and time with gate freeze studies, its effects on part quality, how screw rotation speed and recovery fit in, and what to record. For the wider method, see our guide to scientific molding.
Injection molding holding pressure (pack and hold) is applied after the switchover from fill, typically at about 30–80% of the peak injection pressure depending on material and part, for long enough to keep packing until the gate freezes. Holding time is set with a gate freeze study, where part weight is plotted against hold time until it stops increasing. Too little holding pressure or time causes sink marks, voids, low weight and undersized dimensions; too much causes flash, overpacking, stress and sticking. Screw rotation speed and back pressure control recovery and melt consistency for the next shot.
In short: hold long enough to freeze the gate, at a pressure that gives correct weight and dimensions without flash.
Key points:
- Purpose: compensate for shrinkage after filling.
- Time: set by a gate freeze study.
- Balance: too low causes sink; too high causes flash and stress.
What Does Injection Molding Holding Pressure Do?
Injection molding holding pressure keeps material flowing into the cavity as the plastic cools and shrinks.
Its effects:
- Part weight: more packing adds material.
- Dimensions: higher packing reduces shrinkage.
- Sink marks and voids: packing fills shrinkage in thick areas.
- Residual stress: excessive packing adds stress near the gate.
- Flash: too much pressure opens parting lines.
For example, a thick boss may show a sink mark until holding pressure and time are increased so packing reaches it before the gate freezes. Our guide to troubleshooting injection molding sink marks explains sink causes.
Key Takeaway: Above all, holding pressure controls how much the part shrinks after filling.
How Do You Set Injection Molding Holding Pressure?
You set injection molding holding pressure by starting from a stable fill and adjusting pressure until weight, dimensions and appearance are correct.
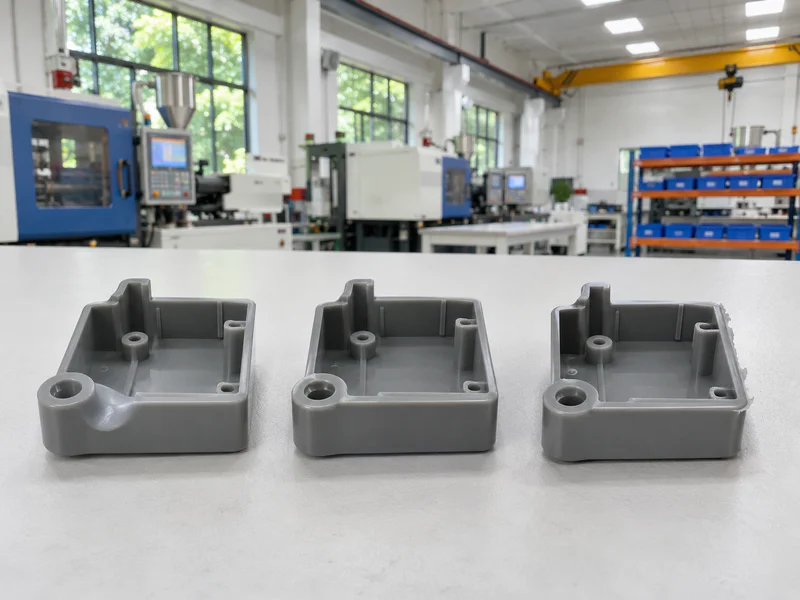
Practical steps:
- Set fill first so the cavity fills about 95–98% on velocity.
- Start holding pressure at a moderate level, often about 50% of peak fill pressure.
- Increase in steps, checking weight, sink and flash.
- Find the window between sink (too low) and flash (too high).
- Set the final value near the middle of the window.
For example, if sink disappears at 60 MPa and flash starts at 85 MPa, a setting near 70 MPa gives margin on both sides. Our guide to decoupled molding explains separating fill and pack.
Key Takeaway: In other words, aim for the middle of the window, not the edge.
How Is Holding Time Set With a Gate Freeze Study?
Holding time is set with a gate freeze study by weighing parts at increasing hold times until weight stops rising.
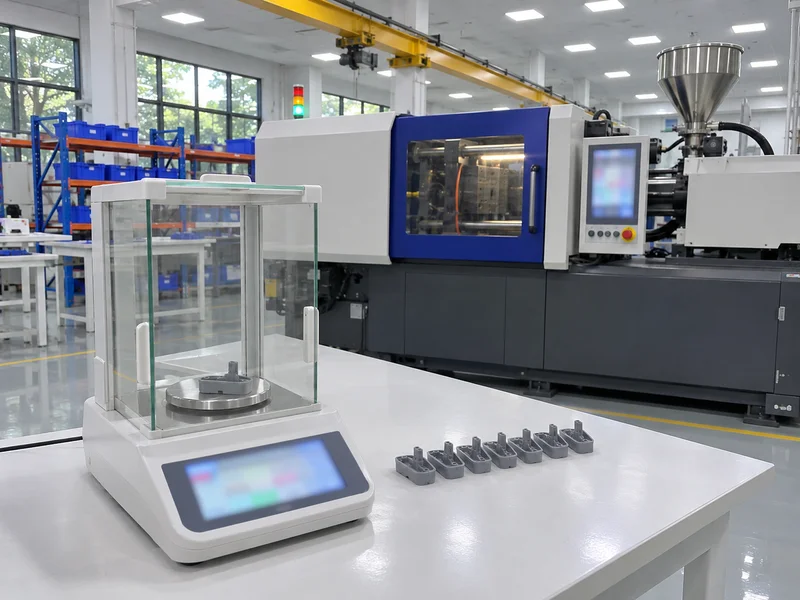
Study steps:
- Keep all other settings fixed.
- Mold parts at increasing hold times, such as 1, 2, 3… seconds.
- Weigh each part (without runner for cold runners).
- Plot weight vs time.
- Find the plateau where weight no longer increases.
- Add a margin, often about 0.5–1 s.
For example, if weight stops increasing at 4 s, a hold time of about 5 s ensures the gate is frozen. Shorter times let material flow back out of the cavity.
Key Takeaway: For this reason, run a gate freeze study on every new mold; guessing hold time causes drift.
How Does Injection Molding Holding Pressure Affect Part Quality?
Injection molding holding pressure affects part quality in several ways, and each has a typical symptom.
| Holding condition | Typical symptom |
|---|---|
| Too low pressure | Sink marks, voids, short weight, undersized parts |
| Too short time | Sink near the gate, weight variation |
| Too high pressure | Flash, overpacking, sticking, residual stress |
| Uneven packing | Warpage, dimensional differences across the part |
| Profiled pressure | Can reduce stress near the gate |
For example, a long part gated at one end may be overpacked near the gate and underpacked at the far end, causing warpage. Our guide to warpage plastic parts explains packing effects.
Key Takeaway: Overall, read the symptom first, then adjust pressure or time.
How Do Screw Rotation Speed and Recovery Fit In?
Screw rotation speed and recovery fit in because they prepare the melt for the next shot during cooling.
Key points:
- Screw rotation speed: controls how fast melt is prepared; too high adds shear heat.
- Back pressure: improves melt homogeneity and removes air.
- Recovery time: should finish before cooling ends.
- Consistency: stable recovery gives consistent shot size and cushion.
For example, if recovery takes longer than cooling time, the cycle extends and shot size may vary. Reducing screw speed slightly while keeping recovery within cooling time often stabilizes the process. Our guide to estimating molding cycle time explains cycle components.
Key Takeaway: Equally, recovery must fit inside cooling time without overheating the melt.
How Do Materials Change Holding Pressure Settings?
Materials change holding pressure settings because shrinkage and freeze behavior differ.
- Semi-crystalline resins (PP, PA, POM, PBT): higher shrinkage, often longer holding.
- Amorphous resins (ABS, PC, PMMA): lower shrinkage, sensitive to stress.
- Glass-filled grades: lower shrinkage, risk of fiber orientation effects.
- Thin-wall parts: gates freeze quickly, so hold time is short.
For example, POM gears often need well-controlled holding pressure to keep tooth dimensions and avoid voids. Our guide to POM injection molding covers POM settings.
Key Takeaway: As a rule, start from the resin supplier’s guidance and confirm with studies.
What Should Be Recorded for Holding Pressure?
Holding pressure settings should be recorded so the process can be repeated and audited.
Records:
- Holding pressure profile and time
- Gate freeze study results
- Part weight per cavity
- Cushion and switchover position
- Screw speed and back pressure
- Process window limits
For example, a process sheet that lists hold pressure, hold time, cushion and part weight allows a quick check when parts drift. Our plastic injection molding service documents process settings per mold. Test methods for plastics are published by ASTM International.
Key Takeaway: Finally, record part weight with every setting change; it is the fastest health check.
FAQ
- Q: What is holding pressure in injection molding?
- The pressure applied after filling to pack material and compensate for shrinkage.
- Q: How is holding time determined?
- With a gate freeze study, finding when part weight stops increasing.
- Q: What happens if holding pressure is too low?
- Sink marks, voids, low weight and undersized parts.
- Q: What happens if holding pressure is too high?
- Flash, overpacking, sticking and residual stress.
- Q: What does screw rotation speed affect?
- Melt preparation and recovery time for the next shot.
Conclusion
Injection molding holding pressure controls shrinkage, weight and dimensions. Set it in the middle of the process window, set hold time with a gate freeze study, keep recovery within cooling time and record the results. To review a molding process, send your 3D model and 2D drawing to our engineers.