
Prototype CNC Milling: Files, Materials and Tolerances
Prototype CNC milling turns a 3D model into a real metal or plastic part in days, so engineers can test fit, function and appearance before committing to production tooling. Milled prototypes use real engineering materials, such as 6061 aluminum, stainless steel, POM or PEEK, which makes them more representative than many printed parts. They are common for housings, brackets, manifolds, fixtures and early versions of parts that will later be molded or machined in volume.
A good prototype answers a specific question. For example, a prototype housing meant to check assembly fit needs accurate mounting features but not a cosmetic finish, while a trade-show sample needs appearance but not tight tolerances. In this guide, we explain prototype CNC milling: when to use it, how to prepare files, material choice, tolerances and finishes for prototypes, how milled prototypes relate to molded parts, lead times and how to plan iterations. For fast-turn machining, see our guide to rapid CNC machining.
Prototype CNC milling produces functional parts from solid metal or plastic stock using 3-axis, 3+2 or 5-axis machining, typically in small quantities with short lead times. It suits fit and function tests, material evaluation, pre-production samples and parts that will later be machined in volume. Success depends on a clean 3D model, a drawing that marks critical features, a material close to production, realistic prototype tolerances and an agreed finish. For parts that will be injection molded, prototypes should be designed and reviewed with molding constraints in mind.
In short: define the question the prototype must answer, then choose material, tolerances and finish for that question.
Key points:
- Purpose first: fit, function, appearance or validation.
- Real materials: milled prototypes use engineering stock.
- Iterate fast: keep files and revisions controlled.
When Should You Use Prototype CNC Milling?
You should use prototype CNC milling when you need real-material parts quickly in small quantities.
Good uses:
- Fit checks of housings, brackets and assemblies
- Functional tests with real loads, temperatures or fluids
- Material evaluation before choosing a production grade
- Pre-production samples for customer approval
- Bridge parts before tooling is ready
Less suitable:
- Complex internal channels better made by printing
- Very large quantities better made by molding or casting
- Parts identical to molded features such as thin ribs that cannot be milled economically
For example, a sensor housing can be milled from 6061 to check fit with a PCB before the injection mold is cut. Our guide to CNC machining vs injection molding explains the transition.
Key Takeaway: Above all, use milling when material properties matter in the test.
How Should Files Be Prepared for Prototype CNC Milling?
Files for prototype CNC milling should include a clean 3D model and a simple drawing that marks what matters.
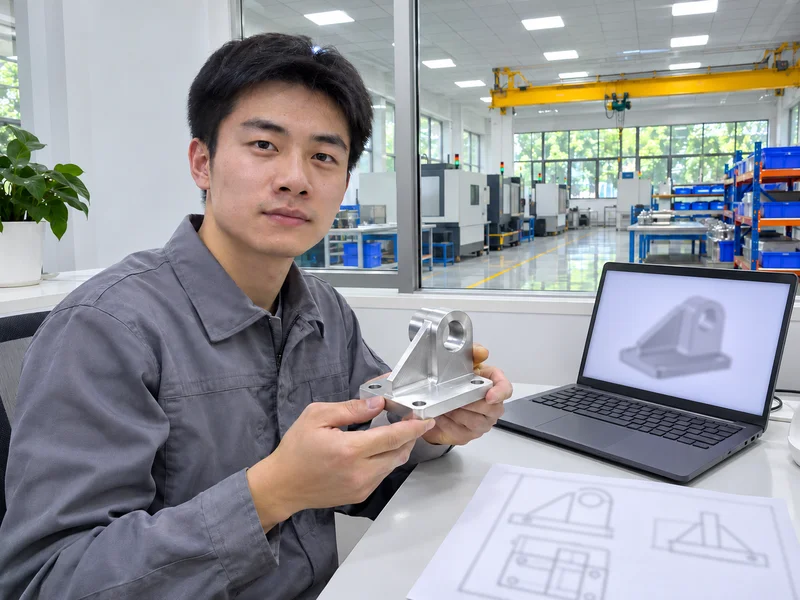
File checklist:
- STEP file of the final revision
- 2D drawing (PDF) with critical dimensions and tolerances
- Threads and fits called out on the drawing
- Material and finish
- Quantity and required date
- Revision number on both files
For example, a model with modeled threads but no thread callout can be machined with plain holes. A drawing note “M4 threads, 8 mm deep” removes doubt. Our guide to threaded holes explains callouts.
Key Takeaway: In other words, the model gives geometry; the drawing gives intent.
Which Materials Are Used for Prototype CNC Milling?
Materials for prototype CNC milling should be as close to production as possible.
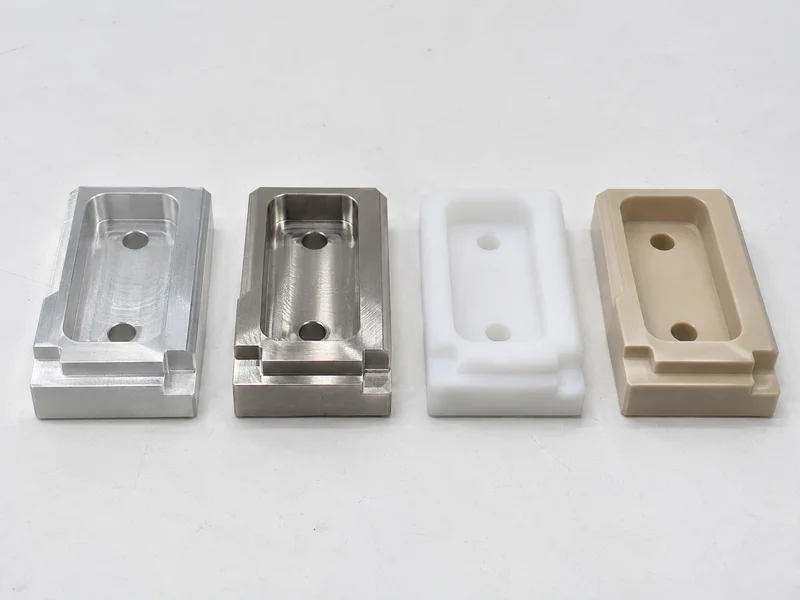
| Material (typical) | Prototype use |
|---|---|
| 6061 / 7075 aluminum | Housings, brackets, structural parts |
| 303 / 304 / 316 stainless | Fluid parts, corrosion tests |
| Carbon and tool steel | Wear and strength tests |
| Brass and copper | Electrical and fluid parts |
| POM, nylon, PEEK | Plastic function and wear tests |
| Titanium | Lightweight high-strength parts |
For example, a part that will be molded in PA66-GF30 may be milled in nylon or POM for early fit tests, accepting that stiffness differs. Our guide to CNC plastic machining explains plastic options.
Key Takeaway: For this reason, state which properties the prototype material must represent.
What Tolerances and Finishes Suit Prototype CNC Milling?
Tolerances and finishes for prototype CNC milling should be tight only where the test needs them.
Guidance:
- General tolerances: ISO 2768-m is often enough for prototypes.
- Critical fits: tighter tolerances on mounting holes, bores and interfaces.
- Surface finish: as-machined for function tests; bead blast or anodize for appearance.
- Edges: break sharp edges unless specified.
For example, a prototype bracket may need ±0.02 mm on two dowel holes and ISO 2768-m elsewhere. General tolerances are defined in ISO 2768. Our guide to tight tolerance machining explains where tight tolerances pay off.
Key Takeaway: Overall, tight tolerances slow prototypes; place them only where needed.
How Do Milled Prototypes Relate to Molded Parts?
Milled prototypes relate to molded parts as a step in development, but they behave differently.
Differences:
- Material: machined stock vs molded resin with orientation and weld lines
- Geometry: milled parts can have thick walls and sharp corners that molding avoids
- Strength: machined plastic often behaves differently from molded plastic
- Cost: no tooling for prototypes; tooling dominates molding cost
Good practice:
- Design the prototype with molding rules (draft, uniform walls) if it will be molded later.
- Review DFM before freezing the design.
For example, a housing milled without draft fits perfectly but may need redesign for molding. Our engineering and DFM review checks both processes.
Key Takeaway: Equally, prototype with the production process in mind to avoid late redesigns.
How Fast Is Prototype CNC Milling?
Prototype CNC milling is fast because no tooling is needed, but lead time depends on complexity, material and finishing.
Lead-time factors:
- Part complexity and number of setups
- Material availability
- Finishing such as anodizing or plating
- Inspection requirements
- Quantity
For example, a simple aluminum bracket may be milled in a few days, while a 5-axis part with anodizing takes longer. Our CNC milling service quotes lead time with each drawing.
Key Takeaway: As a rule, skip cosmetic finishes on early prototypes to save days.
How Should Prototype Iterations Be Managed?
Prototype iterations should be managed with clear revisions and recorded test results.
Practice:
- Number each revision on model and drawing.
- Record what each prototype tested.
- List changes between revisions.
- Keep failed parts for comparison.
- Freeze the design before production tooling.
For example, labeling prototypes “Rev B, fit test” and “Rev C, function test” prevents mixing parts from different revisions. Our quality control and inspection process can supply first article reports for key revisions.
Key Takeaway: Finally, treat prototypes as data; record what each one proved.
FAQ
- Q: What is prototype CNC milling?
- Machining small quantities of parts from solid stock to test design, fit and function.
- Q: What materials can be used for CNC prototypes?
- Aluminum, stainless and carbon steel, brass, copper, titanium and plastics such as POM, nylon and PEEK.
- Q: How accurate are CNC milled prototypes?
- Accurate enough for most fit tests; place tight tolerances only on critical features.
- Q: Is CNC milling better than 3D printing for prototypes?
- When real material properties and accurate fits matter, milling is usually better.
- Q: Can a milled prototype represent a molded part?
- Partly. Geometry and fit can be tested, but molded material behavior differs.
Conclusion
Prototype CNC milling gives real-material parts quickly when the test purpose, files, materials and tolerances are clear. Design with the production process in mind and manage revisions carefully. To start a prototype, send your 3D model and 2D drawing to our engineers.