
Mold Polishing: Standards, Methods and Steel Choice
Mold polishing gives injection mold cavities and cores the surface finish they need, from a functional matte to a mirror finish for clear lenses and glossy covers. Because molded parts copy the steel surface exactly, polish quality directly decides part appearance, release from the mold and sometimes optical performance. For small and medium precision molds with cosmetic or clear parts, polishing is one of the most skilled steps in toolmaking.
Polishing is also easy to over-specify or get wrong. For example, an SPI A-1 mirror finish on a part that will be textured or hidden adds days and cost for no benefit, while polishing a core across the draw direction can make parts stick. In this guide, we explain mold polishing: finish standards, how polishing is done, steel choice, polishing direction and ejection, protecting polished surfaces, inspection and specification. For textured surfaces, see our guide to mold texture.
Mold polishing is the stepwise smoothing of cavity and core surfaces using stones, abrasive papers and diamond compounds after machining or EDM. Finish levels are usually specified by SPI grades (A-1 to D-3) or VDI and Ra values; A-1 to A-3 are mirror diamond finishes for optical and high-gloss parts, B grades are paper finishes, C grades stone finishes and D grades blasted textures. Mirror finishes need clean, hard, polishable steels such as S136, NAK80 or H13 ESR. Polishing direction should follow the draw direction to aid ejection. Specify the finish per surface and approve on molded samples.
In short: choose the polish grade per surface, use polishable steel, polish in the draw direction and protect polished areas.
Key points:
- Standards: SPI A, B, C, D grades.
- Steel: polishable, clean, hard grades.
- Direction: along the draw for ejection.
What Is Mold Polishing?
Mold polishing is the controlled smoothing of mold surfaces to a specified finish.
Purposes:
- Appearance: gloss and clarity on visible parts
- Optical performance: clear lenses and light guides
- Ejection: smoother surfaces reduce friction
- Flow: polished runners and gates
- Cleaning: polished surfaces resist residue
For example, a clear PC light guide needs an A-1 or A-2 finish on its optical faces, while the hidden inside faces can be C-grade. Our guide to clear plastic injection molding explains clear parts.
Key Takeaway: Above all, polish only where the part’s function or appearance needs it.
Which Mold Polishing Standards Are Used?
Mold polishing standards define finish grades so toolmakers and buyers agree.
| SPI grade | Method | Typical Ra (approx.) | Typical use |
|---|---|---|---|
| A-1 / A-2 / A-3 | Diamond buff | about 0.012–0.05 µm | Optical, mirror finishes |
| B-1 / B-2 / B-3 | Abrasive paper | about 0.05–0.2 µm | Glossy cosmetic parts |
| C-1 / C-2 / C-3 | Stone | about 0.25–0.75 µm | Semi-matte, hidden surfaces |
| D-1 / D-2 / D-3 | Blasting | about 0.8–4.5 µm | Matte textures |
For example, “SPI B-2” gives a good gloss for consumer covers at lower cost than A-grade. Our guide to injection molding surface finishes compares standards.
Key Takeaway: In other words, name the SPI grade per surface.
How Is Mold Polishing Done?
Mold polishing is done in stages from coarse to fine, removing the marks of each previous step.
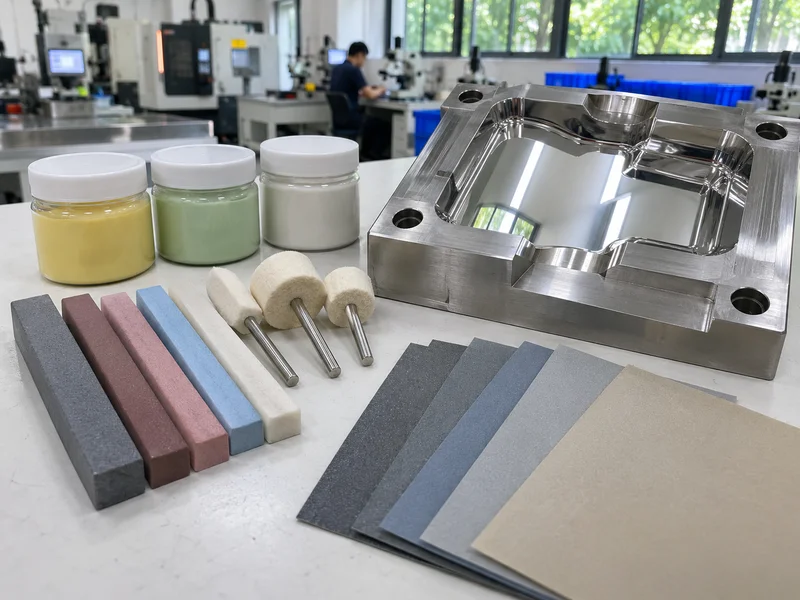
Typical sequence:
- Remove machining or EDM marks with stones.
- Refine with abrasive papers of increasing grit.
- Diamond paste polishing with fine grades for A finishes.
- Clean thoroughly between stages.
- Inspect under light and magnification.
Tools:
- Hand polishing for complex shapes
- Ultrasonic and rotary tools for small areas
- Fine finishing on machines to reduce hand work
For example, fine EDM finishing before polishing saves hours on a deep rib area. Our guide to sinker EDM explains EDM finishes.
Key Takeaway: For this reason, good machining and EDM finishes shorten polishing.
Which Steels Polish Best?
Steels that polish best are clean, uniform and hard.
- S136 / 1.2083 ESR: excellent polish and corrosion resistance
- NAK80: pre-hardened, very good polishability
- H13 ESR / 1.2344 ESR: good polish when hardened
- P20 / 1.2311: adequate for B and C finishes, not ideal for mirrors
- Avoid steels with inclusions for A-1 finishes
For example, an optical lens cavity in S136 hardened to about 50 HRC can reach a mirror finish, while P20 may show pits. Our guide to how to choose mold steel explains steel selection.
Key Takeaway: Overall, mirror finishes start with the right steel.
How Does Polishing Direction Affect Ejection?
Polishing direction affects ejection because microscopic scratches across the draw direction act like small undercuts.
Guidelines:
- Polish along the draw direction on side walls and cores
- Final strokes in the direction of ejection
- Avoid over-polishing cores for some resins that can vacuum-stick
- Combine with sufficient draft
For example, a deep core polished in circles may grip the part; re-polishing along the draw lets it release. Our guide to mold release agent explains why tool fixes are better than spray.
Key Takeaway: Equally, the last polishing strokes should follow ejection.
How Should Polished Mold Surfaces Be Protected?
Polished mold surfaces should be protected from handling, corrosion and process damage.
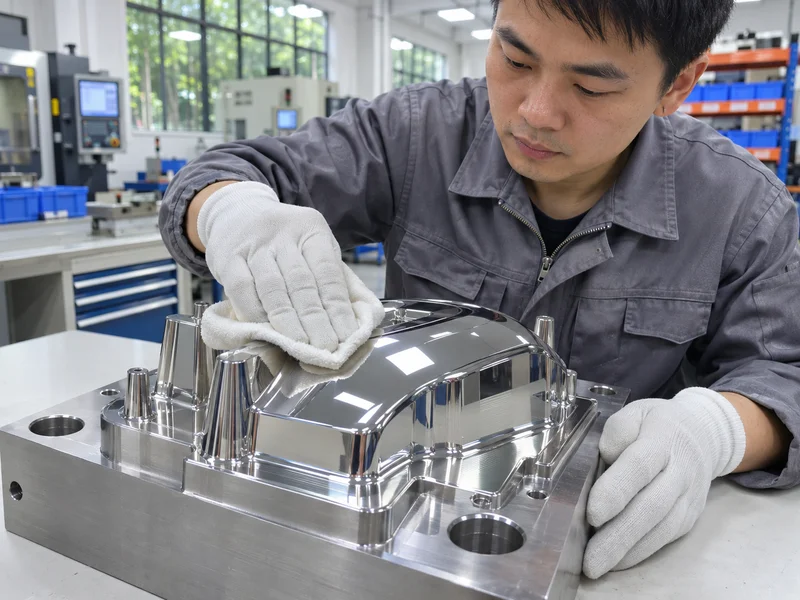
Protection:
- Clean, dry storage with rust preventive
- Covers for polished areas during maintenance
- Avoid touching polished surfaces with bare hands
- Clean vents and gates to prevent burning residue
- Re-polish worn gate areas promptly
For example, a fingerprint left on an A-1 cavity can etch over time and show on clear parts. Our guide to maintenance of molds covers storage and care.
Key Takeaway: As a rule, treat mirror surfaces like optical components.
How Should Mold Polishing Be Specified and Inspected?
Mold polishing should be specified per surface and inspected on steel and molded parts.
Specification items:
- SPI or VDI grade per surface
- Ra values where measurable
- Areas with different finishes
- Steel grade and hardness for polished areas
- Approval method: molded samples
Inspection:
- Visual inspection under defined light
- Roughness measurement where accessible
- Molded part comparison with approved samples
For example, “A-2 on lens faces, B-2 on outer cosmetic surfaces, C-2 elsewhere; approve on molded samples” is clear. Our injection mold manufacturing service includes mirror polish. Surface roughness methods are described by ISO.
Key Takeaway: Finally, approve polish on molded parts, not only on steel.
FAQ
- Q: What is mold polishing?
- Smoothing mold surfaces in stages to a specified finish for part appearance and release.
- Q: What is an SPI A-1 finish?
- A mirror finish made with fine diamond compound, used for optical parts.
- Q: Which steel is best for mirror polishing?
- Clean, hard steels such as S136, NAK80 or H13 ESR.
- Q: Why polish in the draw direction?
- Cross scratches act like undercuts and make parts stick.
- Q: How is polish quality checked?
- Visually under defined light, by roughness measurement and on molded samples.
Conclusion
Mold polishing decides part appearance and release. Choose the grade per surface, use polishable steel, polish along the draw and protect finished surfaces. To review finishes for your mold, send your 3D model and 2D drawing to our engineers.