
Prototype Injection Molding: Aluminum vs Steel Tools
Prototype injection molding makes real molded parts, in the production resin, before you commit to a full production mold. It sits between 3D printing and volume tooling. You get parts that shrink, warp and assemble like the final product, so design problems show up while changes are still cheap.
The risk is treating the prototype as a separate project. For example, a buyer may approve a housing from an aluminum prototype tool, then find that the steel production mold needs a different gate, more draft and new cooling. As a result, the “approved” part changes and testing starts again. In this guide, we explain how prototype injection molding works, what it costs, which tool to choose and how to move from first shots to a production-ready tool without repeating work. For the tooling side alone, see our guide to prototype tooling for injection molding.
Prototype injection molding produces small quantities of real molded parts, usually from tens to a few thousand pieces, from a simplified aluminum or soft-steel tool. It uses the production resin, so parts show true shrinkage, strength, surface and fit. It is the right step when you need functional testing, certification samples or pilot builds before volume tooling. It is not ideal when the design will still change a lot, when only appearance models are needed, or when the final mold will use a very different gate, cooling or cavity layout.
In short: use prototype injection molding to test the real part in the real material, and design the prototype tool so its lessons carry into production.
Key points:
- Real material: parts behave like production parts.
- Lower tool cost: simpler tools, fewer cavities, faster build.
- Planned transfer: gate, draft and wall design should match the production mold.
What Is Prototype Injection Molding?
Prototype injection molding is injection molding with a simplified, lower-cost mold built to make a limited number of parts. The process is the same as production molding: melt, inject, pack, cool and eject. The difference is in the tool and the goal.
A prototype tool usually has:
- One cavity, sometimes a family of two parts
- Aluminum or pre-hardened steel instead of hardened tool steel
- Manual inserts or hand-loaded cores instead of complex slides
- Simple cooling and a cold runner
- A shorter life, matched to the prototype quantity
The goal is learning, not volume. Each part should answer a question about fit, function, appearance or process.
Key Takeaway: Write down what each prototype build must prove. That list decides how much tool you need.
When Is Prototype Injection Molding the Right Step?
Prototype injection molding is the right step when the part must be tested in its real material and real process. Printed or machined parts cannot show molded shrinkage, weld lines or gate effects.
Use it for:
- Functional tests, such as snap-fits, living hinges and drop tests
- Certification and compliance samples that must be molded
- Assembly trials with mating parts and fasteners
- Pilot builds for early customers or field tests
- Process learning, such as cooling, warpage and cycle time
On the other hand, it is not the best step when the design still changes every week, or when only a visual model is needed. In those cases, 3D printing or a plastic CNC prototype is faster and cheaper.
Key Takeaway: Mold prototypes once the geometry is stable enough to justify a tool.
Aluminum or Steel Tools for Prototype Injection Molding?
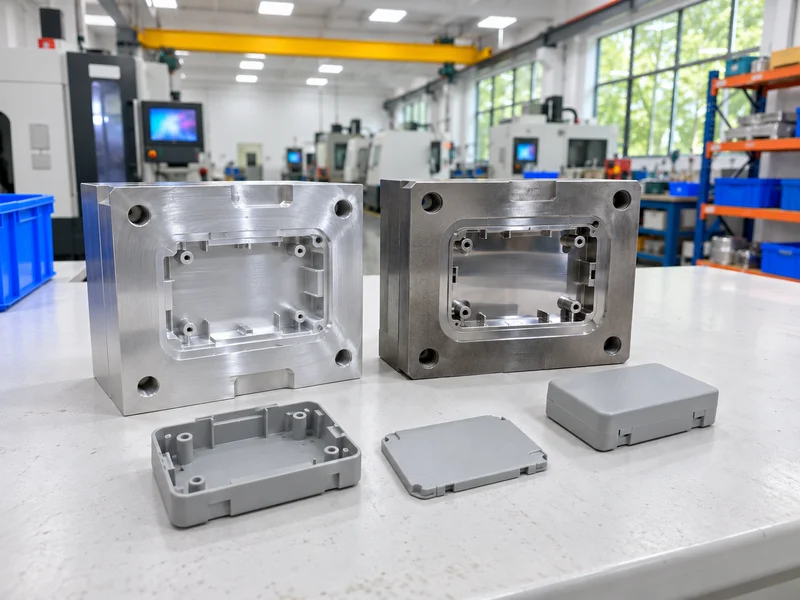
For prototype injection molding, aluminum tools are faster to machine and cool well, while pre-hardened steel tools last longer and transfer more easily to production.
| Factor (typical) | Aluminum prototype tool | Pre-hardened steel tool (e.g. P20, 718H) |
|---|---|---|
| Build speed | Fastest | Fast |
| Tool life | Hundreds to thousands of shots | Thousands to tens of thousands |
| Glass-filled resins | Wears quickly | Better |
| Fine texture and polish | Limited | Better |
| Changes and welding | Easy to machine, hard to weld | Can be welded and re-cut |
| Path to production | Usually replaced | Can become a bridge tool |
For example, a 500-piece run of unfilled ABS housings suits aluminum well. In contrast, 5,000 pieces of glass-filled PA66 usually justify P20 or 718H steel. Tool steel grades and their properties are defined in standards such as those from ASTM International. Our guide to how to choose mold steel explains the main grades.
Key Takeaway: Choose the tool material from quantity, resin and how long the tool must stay useful.
How Much Does Prototype Injection Molding Cost?
The cost of prototype injection molding comes mainly from the tool, then from setup and parts. The tool is cheaper than a production mold because it is simpler, not because the work is easier.
Main cost drivers:
- Part size and complexity: larger parts need larger blocks and more machining.
- Undercuts: hand-loaded inserts are cheaper than slides but slow the cycle.
- Surface finish: polish and texture add hours.
- Resin: abrasive or high-temperature resins wear soft tools faster.
- Quantity: more shots may justify steel and better cooling.
- Changes: each design revision adds machining and new samples.
For example, a simple single-cavity tool for a flat cover costs far less than a tool for a housing with four undercuts and a textured face. We do not publish fixed prices. Instead, each quote follows the drawing. For a broader view, see understanding injection mold cost.
Key Takeaway: Remove undercuts and cosmetic finishes that the prototype does not need to prove. They are often the largest cost items.
How Do You Design a Prototype Tool That Transfers to Production?
You design a prototype tool that transfers to production by keeping the features that control the part the same as the production mold will have.
Keep these the same where possible:
- Gate type and location, because they set weld lines, flow and warpage
- Draft angles and wall thickness, because they affect ejection and shrinkage
- Parting line, because it decides flash and cosmetic lines
- Resin grade and color, because shrinkage varies by grade
- Critical dimensions, cut with the same shrinkage allowance
You can simplify other features, such as cooling layout, ejector style and the number of cavities. For example, a production 4-cavity mold can be preceded by a 1-cavity prototype that copies the gate and parting line of one cavity. As a result, the test data still apply.
Key Takeaway: Simplify the tool, not the part. Gate, draft and parting line should match production.
What Happens From First Shots to a Production-Ready Tool?
From first shots to a production-ready tool, the part moves through trial, measurement, changes and approval. Planning these steps avoids surprises later.
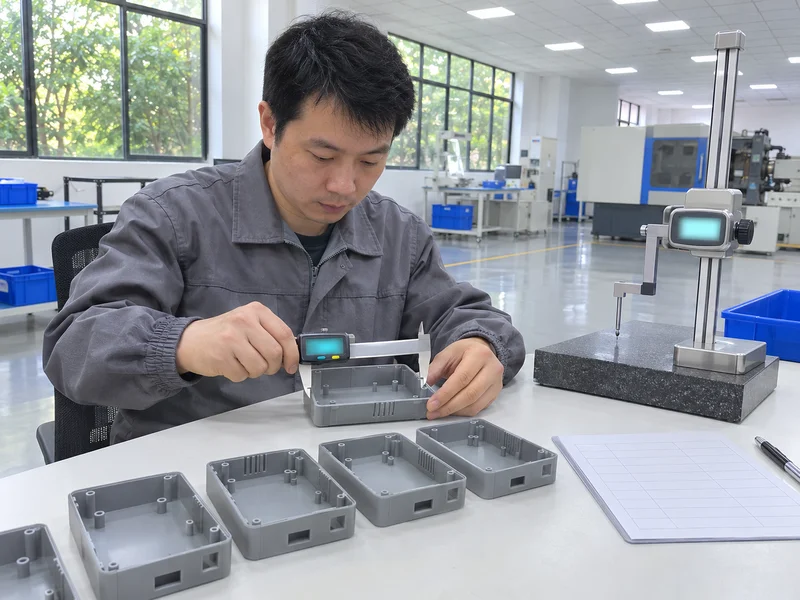
A typical path:
- T1 trial: first molded parts, process window and short-shot checks.
- Measurement: key dimensions, weight and appearance against the drawing.
- Tool changes: steel-safe adjustments, gate or vent fixes.
- T2 and T3 trials: confirm the changes and stabilize the process.
- Functional testing: assembly, strength and environmental tests.
- Design freeze: lock the geometry for the production mold.
- Production tool build: using the prototype lessons.
Our standard mold quote includes up to 3 mold trials and 10-shot samples, with typical mold lead times of 4–8 weeks depending on complexity. Our engineering and DFM review after kickoff helps set the gate, draft and wall decisions before steel is cut.
Key Takeaway: Treat the prototype as T0 of the production project. Record every change and the reason for it.
What Are the Limits of Prototype Injection Molding?
Prototype injection molding has limits, so test results must be read with care. Some properties of production parts differ from prototype parts.
Common differences:
- Cycle time: aluminum cools faster, so production cycles may be longer.
- Residual stress and warpage: different cooling changes them.
- Cosmetic finish: soft tools show wear and limited polish.
- Hand-loaded inserts: slower and less repeatable than slides.
- Tool wear: dimensions drift sooner in aluminum.
Therefore, critical approvals, such as final dimensional sign-off or PPAP, are normally done on parts from the production mold. Our guide to injection molding tolerances explains how tool and process affect dimensions.
Key Takeaway: Use prototype parts to make design decisions. Use production-tool parts for final approval.
How Do You Request a Prototype Injection Molding Quote?
You request a prototype injection molding quote with the 3D model and 2D drawing first. Other information can follow, but these two files let engineers judge the tool.
Helpful extra details:
- Quantity, now and at the next stage
- Resin grade and color
- Critical dimensions and cosmetic faces
- What the prototype must prove
- Expected production volume and cavity count
With this, the supplier can suggest aluminum or steel, a gate location and a tool plan that can grow into plastic injection molding at volume.
Key Takeaway: Tell the supplier the production plan as well as the prototype quantity. The best prototype tool depends on both.
FAQ
- Q: What is prototype injection molding?
- It is injection molding with a simplified, lower-cost tool to make small quantities of real molded parts in the production resin.
- Q: How many parts can a prototype mold make?
- Aluminum tools typically make hundreds to thousands of parts; pre-hardened steel tools can make thousands to tens of thousands, depending on resin and design.
- Q: Is prototype injection molding cheaper than 3D printing?
- Per part, yes, once quantities rise. For a few parts or changing designs, 3D printing is usually cheaper.
- Q: Can a prototype mold become a production mold?
- A steel prototype tool can sometimes serve as a bridge tool. Aluminum tools are usually replaced by a production mold.
- Q: What do I need to get a quote?
- A 3D model and 2D drawing, plus quantity, resin and what the prototype must prove.
Conclusion
Prototype injection molding lets you test real parts before volume tooling. Choose the tool from quantity and resin, keep the gate, draft and parting line close to production, and plan the path to a production-ready mold from the start. To plan your prototype, send your 3D model and 2D drawing to our engineers.