
Living Hinge Design: Materials, Geometry and Gating
Living hinge design creates a thin, flexible strip of plastic that joins two parts of one molded component, so a lid, cap or clip can open and close thousands or even millions of times without a separate hinge. Flip-top caps, boxes, cable clips and cases use living hinges because they cut parts and assembly cost. However, a living hinge only works with the right material, geometry, gate location and first flex.
Most living hinge failures are design or molding issues. For example, a hinge molded in PP but gated so that the flow crosses the hinge sideways may crack within a few hundred cycles, while the same hinge with flow running across its width can last far longer. In this guide, we explain living hinge design for injection-molded parts: materials, geometry, gating and flow, molding, the first flex, testing and when a living hinge is not the right choice. For material background, see our guide to PP copolymer vs homopolymer.
Living hinge design works best in polypropylene, and sometimes polyethylene, because these semi-crystalline resins orient into a tough, fatigue-resistant structure in a thin section. Typical hinge thickness is about 0.2–0.5 mm, with a hinge length of about 1–1.5 mm, generous radii into the thicker walls and a shallow groove so stress spreads evenly. Gate so that the melt flows through the hinge, not along it, avoid weld lines in the hinge and flex the hinge soon after molding to orient it. Validate with cycle tests at the use temperature.
In short: use PP, keep the hinge thin with smooth transitions, flow the melt across the hinge and flex it early.
Key points:
- Material: PP is the standard choice.
- Flow: melt must cross the hinge, without weld lines.
- First flex: orients the hinge and improves life.
What Is a Living Hinge?
A living hinge is a thin, flexible section molded into a part that lets two thicker sections rotate relative to each other.
Common uses:
- Flip-top caps and closures
- Boxes and cases with integral lids
- Cable clips and ties
- Small enclosures and organizers
For example, a shampoo flip-top cap combines cap, lid and hinge in one molded part. Our guide to injection molding for polypropylene parts covers PP processing.
Key Takeaway: A living hinge saves parts and assembly, but only when the material and molding are right.
Which Materials Suit Living Hinge Design?
Materials for living hinge design must withstand repeated bending without cracking.
| Material (typical) | Living hinge suitability | Notes |
|---|---|---|
| PP (homopolymer and copolymer) | Excellent | Standard choice; orients well |
| PE (HDPE, LDPE) | Good | Lower stiffness and heat resistance |
| TPE (as overmold) | Fair | Used for soft hinges in 2K parts |
| Nylon | Limited | Can work in thin sections with moisture |
| ABS, PC, PS | Poor | Crack after few cycles |
For example, a PC enclosure needing a hinge often uses a separate metal pin or a 2K TPE hinge instead. Fatigue test methods for plastics are published by ASTM International.
Key Takeaway: For a true living hinge, choose PP unless there is a strong reason not to.
What Geometry Is Recommended in Living Hinge Design?
Living hinge design geometry should keep the hinge thin, short and smoothly blended into the adjoining walls.
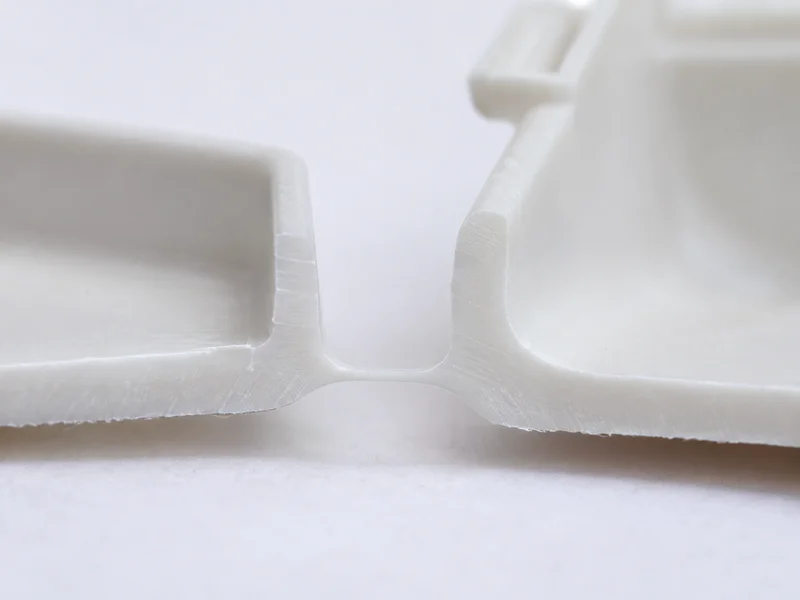
Typical guidance (PP):
- Hinge thickness: about 0.2–0.5 mm
- Hinge land length: about 1–1.5 mm
- Groove: a shallow radius on the inside of the bend
- Transitions: generous radii from the hinge to the walls
- Shoulder: a small shoulder on each side to concentrate bending in the hinge
- Width: as wide as practical to share the load
For example, a 0.3 mm hinge with a 1.2 mm land and radiused transitions distributes strain better than a sharp 0.3 mm notch. Our guide to basics of injection molding design covers wall transitions.
Key Takeaway: Smooth transitions prevent cracks at the hinge edges.
How Should Living Hinges Be Gated and Filled?
Living hinges should be gated so that the melt flows across the hinge in one direction, filling it from one side to the other.
Gating rules:
- Gate on one side of the hinge, so flow passes through it.
- Flow perpendicular to the hinge line.
- Avoid weld lines in or near the hinge.
- Fill the hinge quickly so it does not freeze off.
- Do not gate in the hinge itself.
For example, a box with the gate on the lid side and flow crossing the hinge into the body gives a strong hinge. Gating both halves separately can create a weld line in the hinge. Our guide to 9 ways to fix injection molding weld lines explains weld line control.
Key Takeaway: Gate location decides hinge life. Fix it during design review.
How Does Molding Affect Living Hinge Performance?
Molding affects living hinge performance through melt temperature, injection speed, mold temperature and cooling.
Process factors:
- Fast injection to fill the thin hinge before it freezes
- Adequate melt temperature within the supplier’s range
- Uniform mold temperature at the hinge area
- Good venting to avoid burns at the end of fill
- Consistent cycle for repeatable orientation
For example, a hinge that hesitates during filling can form a weak, partly frozen section. Increasing injection speed or opening the hinge slightly can solve it. Our guide to short shot injection molding explains hesitation.
Key Takeaway: Fill the hinge fast and fully.
Why Should a Living Hinge Be Flexed After Molding?
A living hinge should be flexed soon after molding because the first flex orients the polymer chains and strengthens the hinge.
Practice:
- Flex once or several times while the part is still warm
- Use an automated station or in-mold closing for volume parts
- Close the lid before packing when possible
For example, flip-top caps are often closed in the mold or right after ejection. Hinges left unflexed until the part is cold may be more brittle on first use.
Key Takeaway: Plan the first flex into production, not left to the end user.
How Should Living Hinge Design Be Tested?
Living hinge design should be tested on molded parts for cycle life, strength and behavior at temperature.
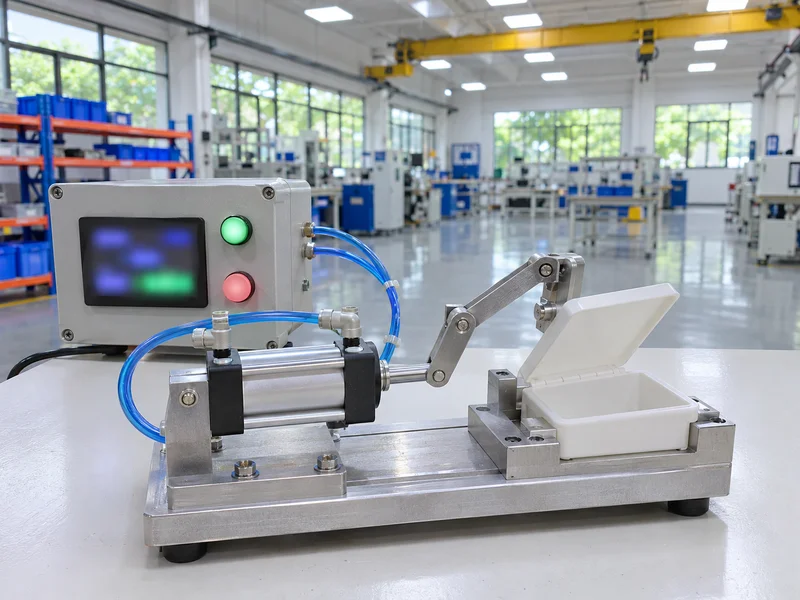
Tests:
- Cycle test to the required number of openings
- Low-temperature flex test
- Pull test of the hinge
- Visual inspection for whitening and cracks
- Aging test if required
For example, a cap may need 1,000 cycles at room temperature and 100 at −10 °C without cracks. Our plastic injection molding service supports sample runs for such tests.
Key Takeaway: Test hinges cold. Low temperature reveals weak hinges fastest.
FAQ
- Q: What is a living hinge?
- A thin, flexible molded section joining two parts of the same component.
- Q: What is the best material for living hinges?
- Polypropylene, because it orients into a tough, fatigue-resistant structure.
- Q: How thick should a living hinge be?
- Typically about 0.2–0.5 mm in PP.
- Q: Why do living hinges crack?
- Wrong material, sharp transitions, weld lines in the hinge or poor flow direction.
- Q: Should a living hinge be flexed after molding?
- Yes. Flexing soon after molding orients the hinge and improves life.
Conclusion
Living hinge design succeeds with PP, a thin hinge with smooth transitions, flow that crosses the hinge without weld lines and an early first flex. Validate with cycle tests at temperature. To review a hinge design, send your 3D model and 2D drawing to our engineers.