
Machining Milling Process: Operations and Strategies
The machining milling process removes material with a rotating multi-tooth cutter while the workpiece or tool moves along programmed paths. It is the main way to make prismatic precision parts, such as housings, brackets, plates, manifolds and mold components, from metal and plastic stock. Understanding the steps, from planning and fixturing to roughing, finishing and inspection, helps buyers write better drawings and understand quotes.
Many quality and cost problems start before the first cut. For example, a part programmed without considering how it will be held for the second side may need extra setups and still miss position tolerances between faces. In this guide, we explain the machining milling process: how milling works, the main operations, the step-by-step workflow, milling strategies, how materials change the process, quality control and how design choices make milling easier. For machine types, see our guide to CNC lathe vs CNC mill.
The machining milling process uses a rotating cutter with multiple teeth to remove material as the part or spindle moves in X, Y, Z and, on multi-axis machines, rotary axes. A typical workflow is: review the drawing and model, plan setups and datums, program toolpaths in CAM, set up fixtures and tools, rough to remove bulk material, semi-finish, finish critical features, deburr and inspect. Common operations include face milling, pocketing, contouring, slotting, drilling, tapping and boring. Material, tool choice, cutting parameters and workholding determine accuracy, surface finish and cost.
In short: plan setups and datums first, rough efficiently, finish critical features carefully and inspect from the same datums.
Key points:
- Planning: setups and datums decide accuracy.
- Roughing and finishing: separate goals, separate strategies.
- Inspection: measure from machining datums.
How Does the Machining Milling Process Work?
The machining milling process works by moving a rotating cutter through the material to remove chips.
Basic elements:
- Spindle and cutter: rotate at set speed
- Feed: relative motion between tool and part
- Depth and width of cut: how much material each pass removes
- Coolant or air: removes heat and chips
- CNC program: controls all motions
For example, a 10 mm carbide end mill cutting 6061 aluminum may run at high spindle speed with a light radial width to clear a pocket quickly. Our CNC milling service covers 3-, 4- and 5-axis milling.
Key Takeaway: Above all, speed, feed and engagement together decide productivity and finish.
What Are the Main Operations in the Machining Milling Process?
The main operations in the machining milling process shape different features.
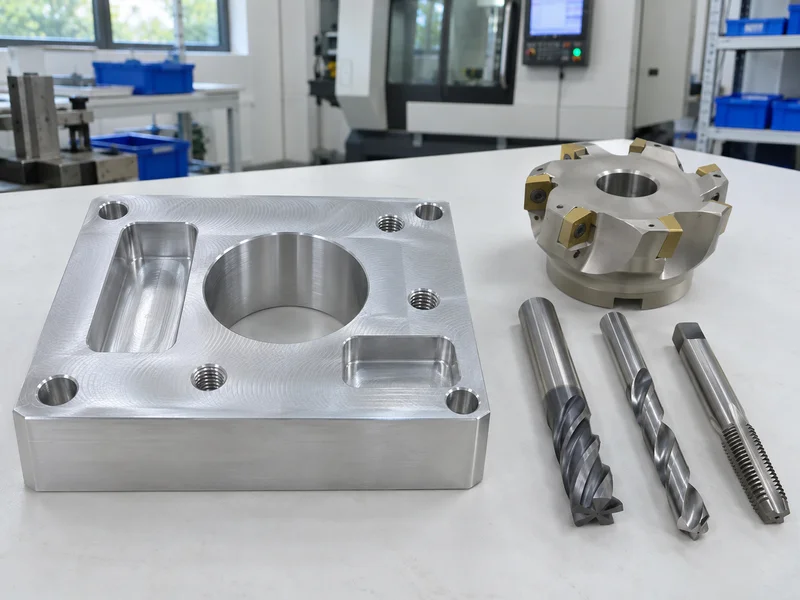
| Operation | Creates | Typical tool |
|---|---|---|
| Face milling | Flat surfaces | Face mill |
| Pocketing | Recesses | End mill |
| Contouring / profiling | Outer and inner profiles | End mill |
| Slotting | Slots and keyways | End mill, slot cutter |
| Drilling | Holes | Drill |
| Tapping / thread milling | Threads | Tap, thread mill |
| Boring | Precise holes | Boring bar |
| 3D surfacing | Curved surfaces | Ball or bull-nose cutter |
For example, a manifold may be face milled, drilled, bored, tapped and contoured in one setup. Our guide to threaded holes compares tapping and thread milling.
Key Takeaway: In other words, most parts combine several operations in each setup.
What Are the Steps of the Machining Milling Process?
The steps of the machining milling process follow a standard workflow.
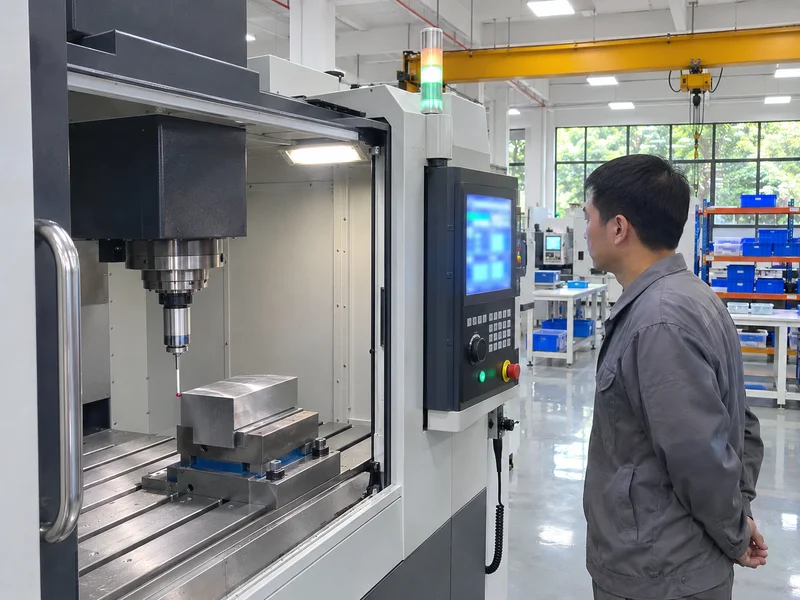
- Review drawing and model; identify critical features and datums.
- Plan setups, workholding and operation order.
- Program toolpaths in CAM and simulate.
- Prepare stock cut to size.
- Set up fixtures and tools; set work offsets.
- Rough to remove bulk material.
- Semi-finish to leave even stock.
- Finish critical features.
- Deburr and clean.
- Inspect from the machining datums.
For example, machining the datum face and dowel holes in setup 1 lets setup 2 locate on them accurately. Our guide to CNC machining fixtures explains locating.
Key Takeaway: For this reason, machine datums first so later setups can use them.
Which Milling Strategies Improve Results?
Milling strategies improve results by controlling tool load, heat and surface quality.
- Adaptive (trochoidal) roughing: constant engagement, faster and safer roughing
- Climb milling: better finish and tool life on most CNC machines
- Rest machining: smaller tools only where needed
- Separate finishing passes: light, consistent stock for accuracy
- 3+2 or 5-axis positioning: shorter tools for deep features
For example, adaptive roughing a steel pocket with full flute length reduces cycle time and tool wear compared with slotting. Our guide to multi axis CNC machining explains tilted-tool access.
Key Takeaway: Overall, rough for speed and finish for accuracy, with different strategies.
How Do Materials Change the Machining Milling Process?
Materials change the machining milling process through cutting speeds, tool choice and heat.
| Material (typical) | Milling behavior |
|---|---|
| Aluminum (6061, 7075) | Fast, easy chips, risk of built-up edge |
| Stainless steel | Slower, work hardening, heat |
| Carbon and alloy steel | Moderate, predictable |
| Titanium | Slow, heat at tool, chatter risk |
| Brass and copper | Brass easy; pure copper sticky |
| Plastics (POM, PEEK, nylon) | Sharp tools, heat and stress control |
For example, a bracket that takes 10 minutes in aluminum may take far longer in stainless. Our guide to CNC milling titanium components explains titanium strategies.
Key Takeaway: Equally, material choice is one of the biggest cycle-time factors.
How Is Quality Controlled in Milling?
Quality in milling is controlled with first-piece checks, in-process measurement and final inspection.
Controls:
- First article inspection after setup
- Tool length and diameter checks
- In-process probing on the machine
- Critical feature checks during the batch
- Final inspection with CMM or gauges
For example, on-machine probing can confirm a bore size before the part is removed, allowing correction without re-clamping. Our quality control and inspection process supplies reports on request. General tolerances follow ISO 2768 unless specified.
Key Takeaway: As a rule, measure critical features before releasing the part from the fixture.
How Can Design Make Milling Easier?
Design can make milling easier by matching features to standard tools and simple setups.
Design tips:
- Internal radii that match standard end mills
- Pocket depth below about 4 × tool diameter where possible
- Features on fewer faces
- Standard hole and thread sizes
- Avoid thin, tall walls
- Tight tolerances only where needed
For example, changing a 1 mm internal radius in a 20 mm deep pocket to 3 mm allows a stiffer tool and faster finishing. Our engineering and DFM review suggests such changes.
Key Takeaway: Finally, designs that suit standard tools cost less and hold tolerances better.
FAQ
- Q: What is the machining milling process?
- Removing material with a rotating multi-tooth cutter along programmed paths.
- Q: What are the main milling operations?
- Face milling, pocketing, contouring, slotting, drilling, tapping, boring and 3D surfacing.
- Q: What is the difference between roughing and finishing?
- Roughing removes bulk material quickly; finishing produces final size and surface.
- Q: What is climb milling?
- Milling where the cutter rotation and feed direction help the tool bite into the material, usually giving better finish.
- Q: How can I make a part easier to mill?
- Use standard radii and holes, shallow pockets and fewer setups.
Conclusion
The machining milling process succeeds when setups and datums are planned first, roughing and finishing use suitable strategies, and inspection follows the same datums. Designs that suit standard tools make milling faster and more accurate. To review a milled part, send your 3D model and 2D drawing to our engineers.