
Gate Blush Injection Molding: Causes and Fixes
Gate blush injection molding defects are dull, cloudy or ring-shaped marks on the part surface around the gate. They are cosmetic rather than structural, but on glossy, dark or textured visible parts they are often enough to reject a lot. Gate blush is a local defect: it forms where the melt first enters the cavity, so its causes are usually found in the gate, the first part of the fill and the mold surface near the gate.
Because it is local, gate blush is easier to diagnose than many defects. For example, if a blush ring appears only around one gate on a multi-gate part, comparing that gate’s size, temperature and position with the others usually points to the cause. In this guide, we explain gate blush injection molding marks: what they look like, what causes them, how to separate them from similar defects, and the tool, process and design fixes that remove them. For other gate-area marks, see our guide to jetting injection molding.
Gate blush injection molding defects are dull or hazy areas around the gate, often in concentric rings, caused by the melt front slipping and freezing irregularly against the cold mold surface as it leaves the gate. Common causes are injection speed too high at the start of fill, a gate that is too small or sharp-edged, low melt or mold temperature, and shear-sensitive materials such as PC, ABS, PC/ABS and PMMA. Fixes include profiling injection speed to start slowly, enlarging or radiusing the gate, raising mold temperature locally, moving the gate to a hidden area and adjusting material or texture.
In short: gate blush comes from how the melt leaves the gate; slow the start of fill, improve the gate and warm the area.
Key points:
- Local defect: look at the gate and the first fill.
- Speed profile: start slow, then speed up.
- Gate design: size, radius and position matter most.
What Do Gate Blush Injection Molding Marks Look Like?
Gate blush injection molding marks look like a dull, matte, cloudy or whitish area around the gate on an otherwise glossy surface.
Typical appearance:
- Concentric rings or halos around the gate
- Dull patches extending a few millimeters to a few centimeters
- Directional streaks pointing away from the gate
- More visible on dark or high-gloss parts
For example, a black glossy PC/ABS cover may show a grey halo around a pin-point gate. On a textured surface, the same defect may look like a shiny patch instead. Our guide to injection molding gate types explains gate shapes.
Key Takeaway: Gate blush is always centered on a gate. Marks elsewhere have other causes.
What Causes Gate Blush Injection Molding Defects?
Gate blush injection molding defects are caused by unstable flow and early freezing of the melt as it exits the gate.
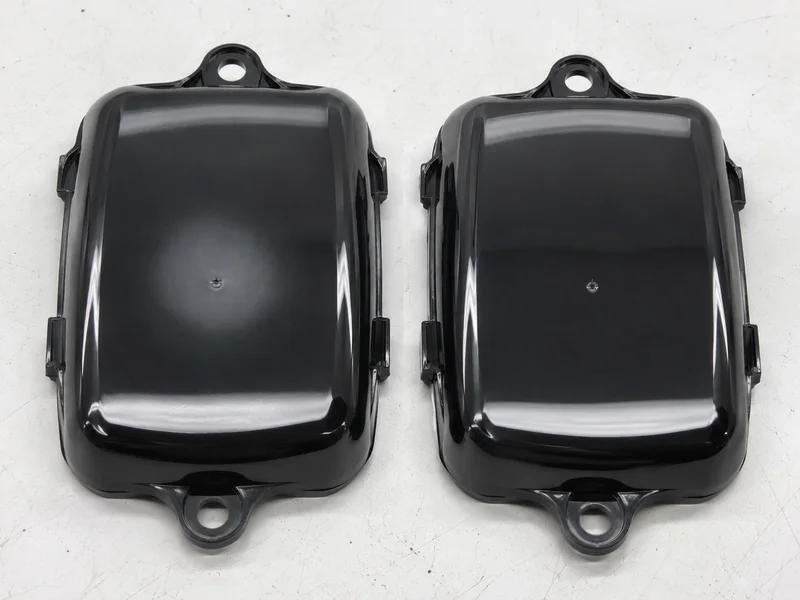
Main causes:
- High initial injection speed: high shear and stick-slip flow at the gate
- Small or sharp gate: concentrates shear
- Low melt temperature: higher viscosity and early skin freezing
- Low mold temperature near the gate: fast skin formation
- Shear-sensitive materials: PC, ABS, PC/ABS, PMMA, some filled grades
- Moisture or volatiles: can add hazy marks near the gate
For example, a part filled at a constant high speed may blush at the gate, while a profile that starts slowly and then accelerates removes it. Our guide to decoupled molding explains speed control.
Key Takeaway: Start with the injection speed profile. It is the fastest test.
How Do You Tell Gate Blush From Similar Defects?
You tell gate blush from similar defects by its position, shape and response to process changes.
| Defect | Location | Shape | Main cause |
|---|---|---|---|
| Gate blush | Around the gate | Halo or rings | Flow instability at gate exit |
| Jetting | Starts at gate, snakes across | Worm-like line | Melt jets into open cavity |
| Splay | Spread over surface | Silver streaks | Moisture or degradation |
| Flow marks | Along flow path | Waves or ripples | Flow front hesitation |
For example, if marks disappear after drying resin longer, the problem was splay, not blush. Our guide to flow marks in injection molding explains ripple marks.
Key Takeaway: Test one change at a time to confirm the defect type.
How Do Process Changes Fix Gate Blush Injection Molding Marks?
Process changes fix gate blush injection molding marks by reducing shear and keeping the melt surface hot as it leaves the gate.
Process fixes:
- Profile injection speed: slow for the first few percent of fill, then faster.
- Raise melt temperature within the supplier’s range.
- Raise mold temperature, especially near the gate.
- Dry the resin to the specified moisture level.
- Check the nozzle and hot runner tip temperature.
For example, slowing the first 5% of the shot can remove blush on a glossy part without increasing cycle time noticeably. Our guide to scientific molding explains how process windows are set.
Key Takeaway: A slow start to injection often removes blush without other changes.
How Do Tool and Gate Design Fix Gate Blush?
Tool and gate design fix gate blush by lowering shear and moving the gate away from visible areas.
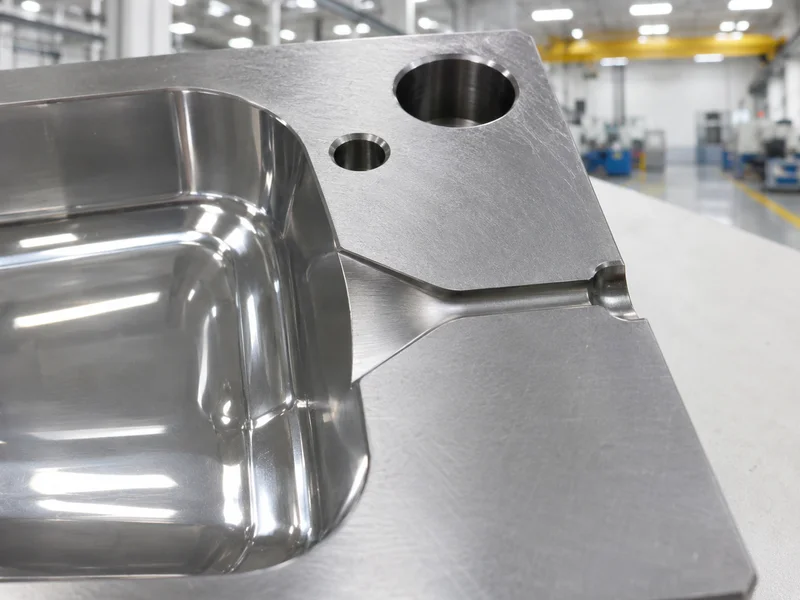
Tool fixes:
- Enlarge the gate to reduce shear
- Radius the gate edge to smooth flow
- Change gate type: fan or tab gates spread the flow
- Move the gate to a hidden or textured area
- Add local heating or better temperature control at the gate
- Use a valve gate with controlled opening for hot runners
For example, a tab gate on a clear PMMA lens moves blush onto the tab, which is cut off after molding. Our guide to valve gate injection molding explains controlled gate opening.
Key Takeaway: Hide the gate or move the blush onto a tab when appearance is critical.
How Do Material and Surface Choices Affect Gate Blush?
Material and surface choices affect gate blush because some resins and finishes show it much more.
- Shear-sensitive resins (PC, ABS, PC/ABS, PMMA) blush more easily.
- High-gloss surfaces make blush very visible.
- Light texture can hide minor blush.
- Dark colors show halos more clearly.
- Some grades are formulated for better surface appearance.
For example, adding a light texture around a gate on an ABS housing can hide minor blush that cannot be removed by process changes. Our guide to injection molding surface finishes explains texture options.
Key Takeaway: Agree the gate location and cosmetic criteria during DFM for glossy dark parts.
How Should Gate Blush Be Specified and Inspected?
Gate blush should be specified in cosmetic criteria that define acceptable size and visibility.
Specification items:
- Cosmetic zones (A, B, C surfaces)
- Gate location agreed on the drawing
- Acceptable blush size per zone
- Viewing distance, angle and lighting
- Boundary samples approved at trial
For example, “no visible blush on A surfaces at 500 mm under diffuse light; blush ≤3 mm around gate on C surfaces” is clear. Our plastic injection molding service uses approved boundary samples for cosmetic parts. Visual appearance practices are also published by ASTM International.
Key Takeaway: Boundary samples settle cosmetic disputes faster than words.
FAQ
- Q: What is gate blush in injection molding?
- A dull or hazy mark around the gate, caused by unstable flow as the melt leaves the gate.
- Q: What causes gate blush?
- High initial injection speed, small or sharp gates, low melt or mold temperature and shear-sensitive materials.
- Q: How do you fix gate blush?
- Slow the start of injection, raise temperatures, enlarge or radius the gate, or move the gate.
- Q: Which materials show gate blush most?
- PC, ABS, PC/ABS and PMMA, especially in dark, glossy colors.
- Q: Is gate blush a structural defect?
- Usually not; it is cosmetic, but it can cause rejection on visible parts.
Conclusion
Gate blush injection molding marks are local defects caused by how the melt leaves the gate. Slow the start of fill, improve the gate and warm the area, and agree gate location and cosmetic criteria early. To review a cosmetic part, send your 3D model and 2D drawing to our engineers.