
Mold Inserts: Steels, Fitting, Locking and Cooling
Mold inserts are separate steel or alloy pieces fitted into an injection mold’s plates to form part or all of the cavity and core. Instead of machining every feature directly into a large plate, toolmakers build critical, complex or wear-prone areas as inserts. For small and medium precision molds, inserts make machining easier, allow better steels where needed and make repairs and design changes much faster.
Insert strategy affects mold cost, life and maintainability. For example, a connector mold with thin core pins in a replaceable insert can be repaired in hours, while the same pins machined into a solid plate could stop production for days. In this guide, we explain mold inserts: types, why they are used, steel choices, fit and venting, interchangeable inserts, maintenance and how to specify them. For mold structure, see our guide to injection mold components.
Mold inserts are cavity, core or detail pieces fitted into mold plates. Common types include cavity and core inserts, sub-inserts for fine details, core pins, interchangeable inserts for part variants, and beryllium-copper or high-conductivity inserts for cooling. Inserts allow harder or more wear-resistant steels in critical areas, easier machining by EDM and grinding, natural venting along split lines, and quick replacement or modification. They require accurate fits, proper locking and cooling, and documented spare parts.
In short: inserts make precision molds easier to build, better performing and faster to maintain.
Key points:
- Types: cavity/core, sub-inserts, pins, interchangeable.
- Benefits: steel choice, machining, venting, repair.
- Requirements: precise fits, locking, cooling.
What Are Mold Inserts?
Mold inserts are separate pieces that form molding surfaces and are fitted into pockets in the mold plates.
Main types:
- Cavity and core inserts: form the main part surfaces
- Sub-inserts: small pieces for ribs, logos or fine details
- Core pins: form holes and bosses
- Interchangeable inserts: produce part variants in one mold
- Gate inserts: replaceable wear areas at gates
For example, a multi-cavity mold for small housings may use one cavity insert per cavity in a common mold base. Our guide to multi-cavity injection molding explains cavity layouts.
Key Takeaway: Above all, inserts break a mold into manageable, replaceable pieces.
Why Are Inserts Used in Molds?
Mold inserts are used because they improve machining, steel selection, venting and maintenance.
Benefits:
- Better steel where needed: hardened inserts in soft plates
- Easier machining: grinding, EDM and polishing on small pieces
- Venting: split lines between inserts release gas
- Repair and replacement: swap worn or damaged inserts
- Design changes: modify one insert instead of the whole plate
- Cost control: expensive steel only in critical areas
For example, a deep rib that is difficult to machine and vent can be built as a separate sub-insert with vents along its sides. Our guide to injection mold venting explains venting.
Key Takeaway: In other words, inserts put precision and wear resistance exactly where needed.
Which Steels Are Used for Mold Inserts?
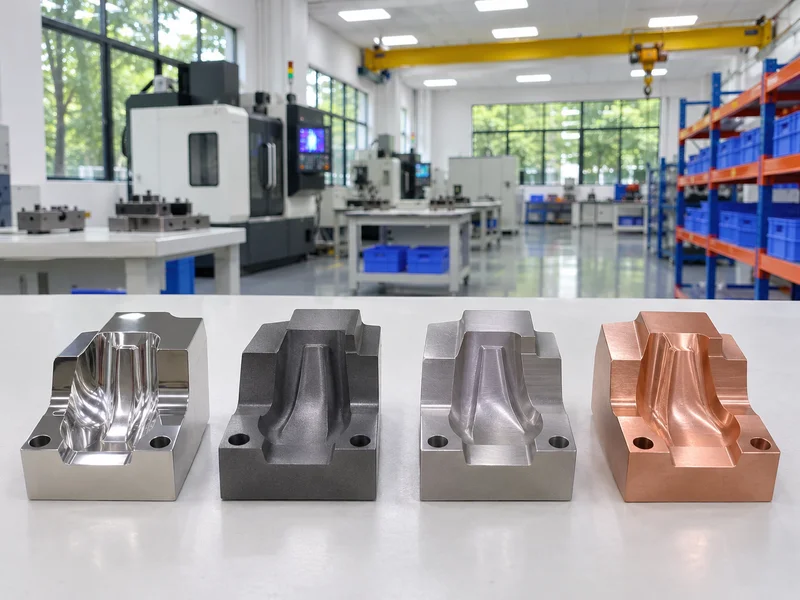
Steels for mold inserts are chosen by wear, polish, corrosion and conductivity needs.
| Material (typical) | Strength | Typical uses |
|---|---|---|
| H13 / 1.2344 hardened | Toughness, heat resistance | Cores, cavities, glass-filled resins |
| S136 / 1.2083 | Corrosion resistance, polish | Clear parts, corrosive resins |
| NAK80 / P20 pre-hardened | Machinability | Lower volume, textured parts |
| D2 / SKD11 | Wear resistance | Gate inserts, abrasive areas |
| Beryllium copper / high-conductivity alloys | Heat transfer | Hot spots, thin cores |
For example, a glass-filled PA66 part may use hardened H13 inserts, while a polished clear PC lens uses S136. Our guide to injection mold steel material explains steel choices. Steel from LKM, ASSAB or Gröditz is supplied with material certificates as available.
Key Takeaway: For this reason, choose insert steel by the resin and surface requirement.
How Should Mold Inserts Be Fitted and Locked?
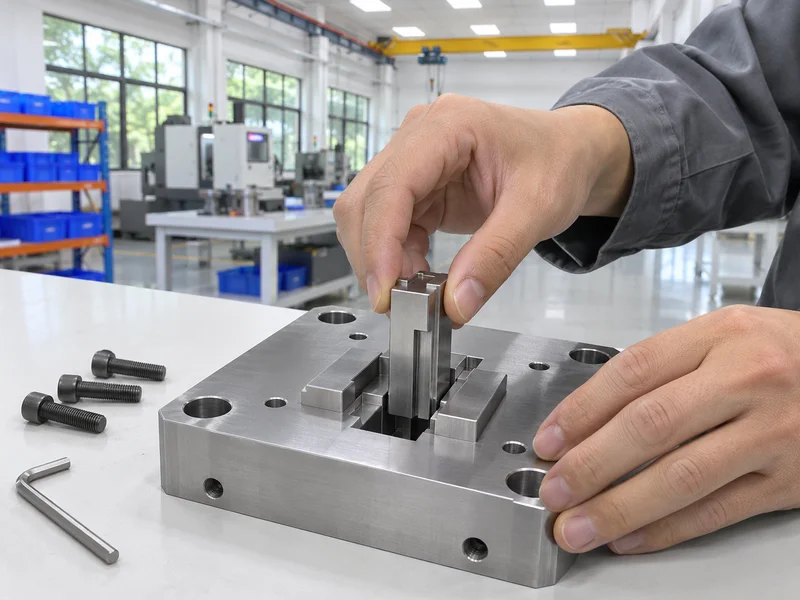
Mold inserts should be fitted and locked accurately so they stay in position under injection pressure.
Requirements:
- Precise pocket fits, ground or wire EDM’d
- Locking features: shoulders, screws, wedges
- Alignment between cavity and core inserts
- Shut-off accuracy to prevent flash
- Sealed cooling across insert boundaries
For example, a cavity insert located by a shoulder and screwed from the back stays secure, while a loose fit can shift and cause mismatch. Our guide to wire EDM explains how insert pockets are cut.
Key Takeaway: Overall, insert fit accuracy decides flash and mismatch.
How Are Inserts Cooled?
Inserts are cooled with channels, baffles, bubblers or high-conductivity materials.
Methods:
- Drilled channels in larger inserts
- Baffles and bubblers in deep cores
- Beryllium copper or high-conductivity inserts in hot spots
- Conformal cooling for complex shapes
- O-ring seals where circuits cross insert boundaries
For example, a thin core that overheats may be replaced with a high-conductivity alloy insert to shorten cycle time and reduce warpage. Our guide to conformal cooling explains advanced options.
Key Takeaway: Equally, include cooling in every insert design, not just the main plates.
What Are Interchangeable Mold Inserts?
Interchangeable mold inserts let one mold produce several part variants by swapping inserts.
Uses:
- Different logos or text
- Variant features, such as holes or lengths
- Prototype and production versions
- Region-specific parts
Considerations:
- Quick-change design with accurate location
- Clear marking of each insert
- Storage and records
- Validation of each variant
For example, a housing mold may use interchangeable inserts for three connector cut-outs, saving two separate molds. Our injection mold manufacturing team designs insert-based molds when variants are planned.
Key Takeaway: As a rule, plan interchangeable inserts at design stage, not later.
How Should Mold Inserts Be Maintained and Specified?
Mold inserts should be maintained as wear parts and specified clearly in the mold documentation.
Maintenance:
- Inspect wear at gates, shut-offs and thin features
- Replace or repair inserts before they cause defects
- Keep spares for critical inserts
- Record changes to insert revisions
Specification:
- Insert steel and hardness
- Spare inserts to be supplied
- Insert numbering and drawings
- Interchangeability requirements
For example, supplying spare core pins and a gate insert with a connector mold reduces downtime. Paid spare parts are available on request. Standard components to HASCO, Meusburger or DME standards make replacement easier; steel grades follow standards such as those from ISO.
Key Takeaway: Finally, list critical inserts and spares in the mold handover documents.
FAQ
- Q: What are mold inserts?
- Separate pieces fitted into mold plates to form cavity, core or detail surfaces.
- Q: Why use inserts in injection molds?
- For better steel selection, easier machining, venting and fast repair.
- Q: Which steel is used for mold inserts?
- H13, S136, NAK80, D2 and others, depending on resin and finish.
- Q: What are interchangeable inserts?
- Inserts swapped to produce different part variants in one mold.
- Q: How are inserts cooled?
- With channels, baffles, bubblers, high-conductivity alloys or conformal cooling.
Conclusion
Mold inserts put the right steel, precision and cooling exactly where a mold needs them, and make repairs and variants fast. Fit them accurately, cool them properly and document spares. To review a mold design, send your 3D model and 2D drawing to our engineers.