
Burn Marks Injection Molding: Causes, Tool and Process Fixes
Burn marks injection molding defects are black, brown or discolored areas on molded parts, usually at the end of fill, in corners, at ribs or opposite the gate. They are caused mostly by trapped air or gas that is compressed and heated so quickly that it scorches the plastic, a process called dieseling. Less often, burn marks come from overheated or degraded material.
Because they appear in predictable places, burn marks are usually quick to diagnose. For example, a burn at the tip of a deep rib almost always means air cannot escape there, so adding or cleaning a vent fixes it, while raising pressure makes it worse. In this guide, we explain burn marks injection molding: what they look like, causes, how to diagnose them, venting and tool fixes, process fixes and how to prevent them in production. For venting, see our guide to injection mold venting.
Burn marks injection molding defects are dark discolorations caused mainly by trapped air compressed at the end of fill (dieseling), and sometimes by overheated or degraded resin. Typical locations are the last areas to fill, deep ribs, blind corners and flow-front meeting points. Fixes include adding or deepening vents, cleaning blocked vents, adding vented ejector pins or inserts, slowing injection speed at the end of fill, lowering melt temperature, reducing residence time and moving gates to change the fill pattern. Prevention relies on vent maintenance and stable process settings.
In short: burn marks usually mean trapped air; vent it out and slow the end of fill.
Key points:
- Main cause: trapped air (dieseling).
- Location: end of fill, ribs, corners.
- Fixes: venting and injection speed.
What Do Burn Marks Injection Molding Defects Look Like?
Burn marks injection molding defects look like black or brown spots, streaks or edges on the part.
Typical appearance:
- Black tips on ribs and bosses
- Brown or yellow discoloration at the end of fill
- Scorched edges where flow fronts meet
- Short shots with burn at the same spot
For example, a clear PC part may show a brown smudge at the far corner, where air was trapped. Our guide to short shot injection molding explains related end-of-fill defects.
Key Takeaway: Above all, burn position points to where air is trapped.
What Causes Burn Marks Injection Molding Defects?
Burn marks injection molding defects are caused by trapped gas or overheated material.
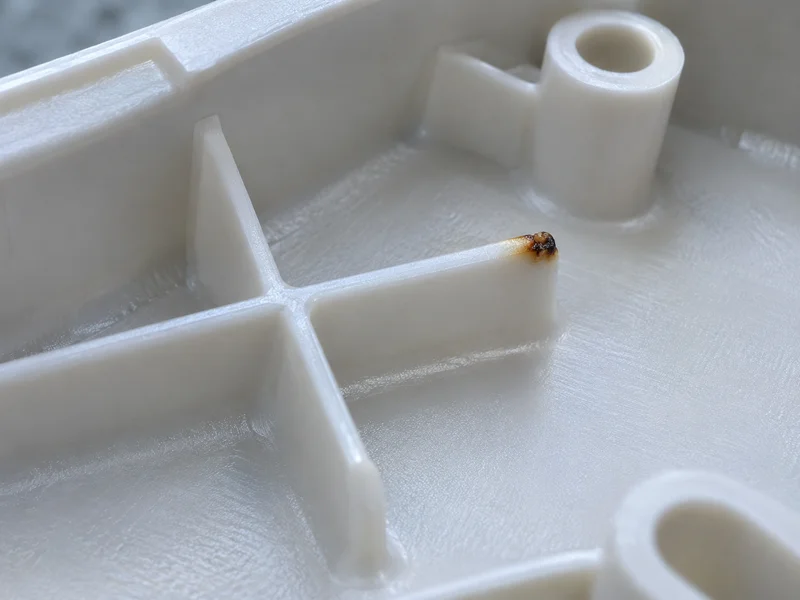
Main causes:
- Insufficient or blocked vents
- Fast injection speed at the end of fill
- Deep ribs and blind pockets without venting
- Flow fronts trapping air between them
- High melt temperature or long residence time
- Volatile additives in some resins
For example, vents clogged with residue after weeks of production can cause burns that were not present at the first trial. Our guide to mold release agent explains how spray buildup blocks vents.
Key Takeaway: In other words, check vents before changing materials.
How Do You Diagnose Burn Marks Injection Molding Problems?
You diagnose burn marks by checking location, fill pattern and vent condition.
Diagnosis steps:
- Mark the burn location on the part.
- Run short shots to see where the flow ends.
- Inspect vents near the burn for blockage.
- Slow end-of-fill speed and observe change.
- Check melt temperature and residence time.
- Look for flow fronts meeting at the burn.
For example, if slowing the last 10% of fill removes the burn, trapped air is the cause. If burns appear randomly with brown streaks, degradation is more likely. Our guide to flow marks in injection molding explains short-shot studies.
Key Takeaway: For this reason, short shots reveal where air is trapped.
How Do Tool Fixes Prevent Burn Marks?
Tool fixes prevent burn marks by giving trapped air a way out.
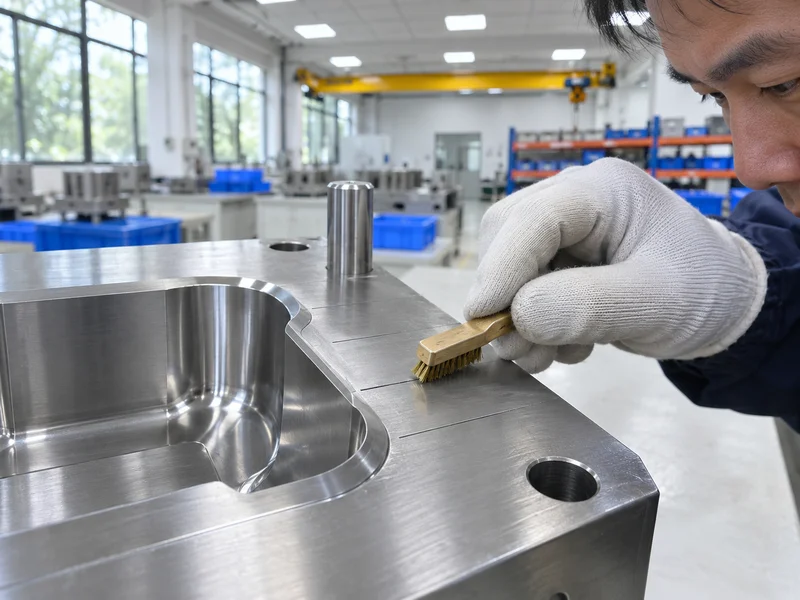
Tool fixes:
- Add vents at the end of fill and parting lines
- Clean or deepen vents within the resin’s flash limit
- Vented ejector pins in blind areas
- Split inserts at deep ribs for natural venting
- Porous steel inserts in hard-to-vent areas
- Move or add gates to change the fill pattern
For example, splitting a deep rib into a separate insert creates a vent line along its tip and removes the burn. Our guide to mold inserts explains insert venting.
Key Takeaway: Overall, venting fixes are usually permanent; process fixes may be temporary.
How Do Process Changes Reduce Burn Marks?
Process changes reduce burn marks by giving air time to escape and reducing heat.
Process fixes:
- Profile injection speed: slow down near the end of fill
- Lower melt temperature within the resin range
- Reduce residence time with a smaller barrel or shorter cycle
- Reduce clamp force slightly if vents are closed by excess clamp
- Dry resin properly to reduce volatiles
For example, cutting the injection speed for the last 5–10% of fill often removes burns at rib tips without affecting the rest of the part. Our guide to scientific molding explains speed profiling.
Key Takeaway: Equally, slow the end of fill rather than the whole shot.
How Do You Prevent Burn Marks in Production?
You prevent burn marks in production with vent maintenance and process control.
Prevention:
- Scheduled vent cleaning
- Avoid release agent buildup
- Monitor fill time and pressure for changes
- Check parts at known burn-prone areas each shift
- Record process settings
For example, adding vent cleaning to weekly mold maintenance prevents gradual return of burns. Our guide to maintenance of molds covers maintenance schedules. Our plastic injection molding service includes such checks.
Key Takeaway: As a rule, burn marks that return usually mean vents need cleaning.
How Should Burn Mark Limits Be Specified?
Burn mark limits should be specified in cosmetic and functional criteria.
Specification items:
- No burns on cosmetic or sealing surfaces
- Allowed discoloration on hidden areas, if any
- Viewing conditions and boundary samples
- Functional checks where burns weaken features
For example, “No visible burn marks on A and B surfaces; slight discoloration allowed on internal rib tips if no material loss” is clear. Visual inspection practices are described by ASTM International.
Key Takeaway: Finally, define where burns are unacceptable.
FAQ
- Q: What causes burn marks in injection molding?
- Mainly trapped air compressed at the end of fill; sometimes degraded material.
- Q: Where do burn marks usually appear?
- At the end of fill, rib tips, blind corners and where flow fronts meet.
- Q: How do you fix burn marks?
- Add or clean vents and slow injection near the end of fill.
- Q: Can high melt temperature cause burns?
- Yes, overheated or degraded resin can cause dark streaks.
- Q: Why do burn marks return after fixing?
- Vents fill with residue over time and need regular cleaning.
Conclusion
Burn marks injection molding defects mostly point to trapped air. Diagnose with short shots, improve venting, slow the end of fill and keep vents clean in production. To review a molding problem, send your 3D model and 2D drawing to our engineers.