
The Injection Molding Process, Step by Step
The injection molding process melts plastic pellets, injects the melt into a closed steel mold under high pressure, holds it while it packs and cools, and then opens the mold to eject a finished part. One cycle usually takes from a few seconds to about a minute. For buyers, however, the process starts much earlier: with part design, mold design, mold building and trials, long before the first production shot.
Understanding each step helps buyers ask the right questions. For example, a part with a 4 mm wall can need roughly four times the cooling time of the same part at 2 mm, which changes the piece price for its whole life. Likewise, skipping a resin drying check can produce brittle parts that look perfect. In this guide, we walk through the injection molding process step by step from a buyer’s point of view, and show what to check at each stage. For the fundamentals, see our beginner’s guide to injection molding.
The injection molding process has four main stages in each cycle: filling (the screw injects molten plastic into the mold cavity), packing or holding (extra material is pushed in to compensate for shrinkage), cooling (the part solidifies in the mold) and ejection (the mold opens and ejector pins push the part out). Around the cycle, a project also includes part design and DFM, mold design and manufacturing, mold trials and approval, and production with quality control.
In short: the cycle is fill, pack, cool and eject; the project around it decides cost and quality.
Key points:
- Cycle: fill, pack, cool and eject, repeated for every shot.
- Project: design, mold build, trials and approval come first.
- Buyer control: wall thickness, material and quality requirements drive cost.
What Are the Steps of the Injection Molding Process?
The steps of the injection molding process fall into two groups: the project steps that happen once, and the cycle steps that repeat for every part.
Project steps (once per part):
- Part design and DFM review
- Mold design
- Mold manufacturing
- Mold trials and corrections
- Sample and document approval
- Production
Cycle steps (every shot):
- Mold closing and clamping
- Filling
- Packing and holding
- Cooling, while the screw prepares the next shot
- Mold opening and ejection
Most buyer decisions affect the project steps. Most part-to-part variation comes from the cycle steps. Therefore, both matter.
Key Takeaway: Separate one-time costs (mold, trials, approval) from per-part costs (cycle time, material). Quotes show both.
How Does Part Design Affect the Injection Molding Process?
Part design affects the injection molding process because it sets how the plastic flows, how long it cools and how easily the part leaves the mold. A good design makes every later step easier.
Key design factors:
- Wall thickness: uniform walls fill evenly and cool faster.
- Draft: angled walls release from the mold without drag marks.
- Ribs instead of thick sections: add stiffness without sink marks.
- Radii: rounded corners improve flow and reduce stress.
- Undercuts: need slides or lifters, which add mold cost.
For example, a housing with 3 mm walls and solid bosses may show sink marks and long cycles. The same housing with 2 mm walls, cored bosses and ribs often molds faster and looks better. Our guide to injection molding design basics covers these rules.
Key Takeaway: Ask for a DFM review before the design is frozen. It is the cheapest point to change the process.
How Are the Mold Design and Build Part of the Process?
Mold design and build are part of the injection molding process because the mold controls the part’s shape, surface, cooling and ejection. The mold is the most expensive and slowest single item in most projects.
The mold design decides:
- Cavity count and layout
- Gate type and position, which control how plastic enters
- Runner system, cold or hot runner
- Cooling channels, which control cycle time
- Ejection, including pins, sleeves or strippers
- Steel, which controls mold life
Mold and machine interfaces follow standards such as those from EUROMAP, so the mold fits the planned press. A typical mold lead time is 4–8 weeks, depending on complexity, steel, hot runner, texture and validation. For gate choices, see our guide to injection molding gate types.
Key Takeaway: Review the mold design, not only the part. Gates, cooling and ejection affect every part the mold ever makes.
What Happens in the Filling Stage of the Injection Molding Process?
In the filling stage of the injection molding process, the screw pushes molten plastic through the nozzle, runner and gate into the closed mold cavity. Filling usually takes a fraction of a second to a few seconds.
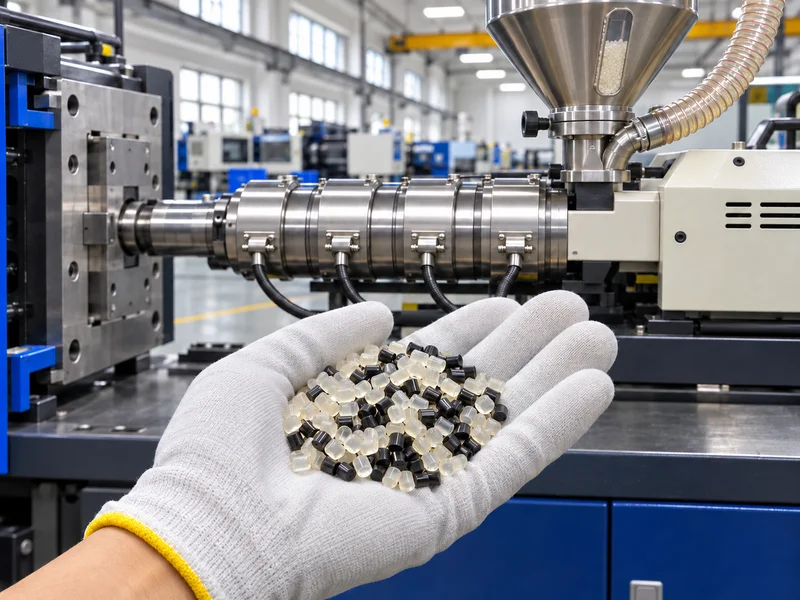
Before filling, the resin is prepared:
- Drying: hygroscopic resins such as PA, PC and PBT are dried to low moisture.
- Melting: heater bands and screw rotation melt the pellets.
- Dosing: the screw measures the exact amount of melt for the next shot.
During filling, the speed and temperature decide how the melt flows. Too slow, and the plastic freezes before filling the part. Too fast, and air can be trapped or the material can burn. Our guide to plastic resin drying explains why drying matters before this stage.
Key Takeaway: Ask how the supplier controls resin drying. Wet resin causes defects that inspection may not catch.
What Happens During Packing and Cooling?
During packing and cooling, the injection molding process turns the filled cavity into a stable, accurate part. Packing pushes extra material in as the plastic shrinks; cooling solidifies the part until it is stiff enough to eject.
- Packing pressure reduces sink marks and controls dimensions.
- Holding time lasts until the gate freezes.
- Cooling time is usually the longest part of the cycle.
- Mold temperature affects surface, shrinkage and crystallinity.
Cooling time grows with the square of the thickest wall. As a result, a small increase in thickness can add many seconds to every cycle. Our guide to the injection mold cooling time calculation formula shows a worked example.
Key Takeaway: Thick walls cost money in every cycle. Check the thickest section before approving the design.
How Does Ejection Finish the Injection Molding Cycle?
Ejection finishes the injection molding cycle by opening the mold and pushing the cooled part off the core. Then the mold closes and the next cycle begins.
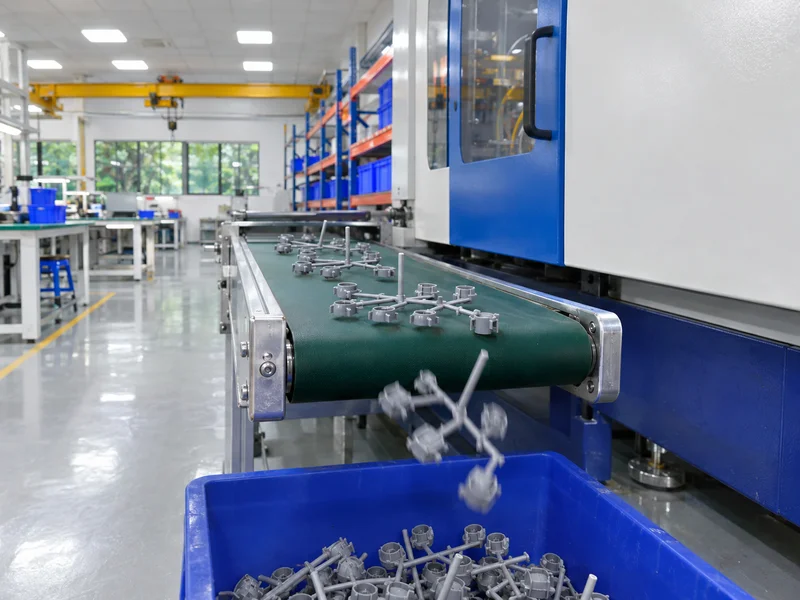
Ejection depends on:
- Draft, which lets the part release
- Ejector layout, which spreads the pushing force
- Part stiffness at the moment of ejection
- Automation, such as robots or conveyors
Parts are often removed by robot, especially for cosmetic parts that must not fall. In addition, runners are separated and may be reground, if the customer allows regrind. Our article on ejector pin marks explains how ejection affects appearance.
Key Takeaway: Agree on regrind rules and cosmetic standards before production. Both affect what you receive.
How Are Mold Trials and Approval Handled?
Mold trials and approval prove that the mold and the injection molding process make conforming parts before production starts.
A typical sequence:
- T1 trial: first shots, check filling and function.
- Corrections: steel changes for dimensions or appearance.
- Further trials: confirm the corrections.
- Process setting: define a stable process window.
- Sample approval: dimensional report and samples to the customer.
- Documents: FAI or PPAP, when required.
Our standard mold quote includes up to three mold trials and 10-shot samples, and every export mold is trialed and inspected before packing. For approval documents, see our guides to the first article inspection report and PPAP levels.
Key Takeaway: Plan time for at least one correction loop. Few molds are perfect at T1.
How Is Quality Controlled During Production?
Quality is controlled during production by keeping the injection molding process stable and checking parts at defined points. Stable settings make stable parts.
Typical controls:
- First-off approval at each startup
- Process monitoring of temperatures, pressures and cycle time
- Sampling inspection of key dimensions
- Visual checks against the cosmetic standard
- Material traceability by resin lot
- Reaction plan when a check fails
Common problems, such as short shots, flash, sink marks and warpage, usually trace back to material, mold or process changes. Our guide to injection molding defects and troubleshooting covers the causes.
Key Takeaway: Ask which characteristics are checked, how often and what happens when a check fails. That is the real quality plan.
FAQ
- Q: What are the 4 stages of the injection molding process?
- Filling, packing or holding, cooling and ejection.
- Q: How long does an injection molding cycle take?
- Typically from a few seconds to about a minute, depending mostly on wall thickness and material.
- Q: What is the longest part of the cycle?
- Usually cooling, because heat must leave the thickest wall before the part can be ejected.
- Q: How long does it take to build an injection mold?
- A typical mold takes about 4–8 weeks, depending on complexity, steel, hot runner, texture and validation.
- Q: Why do some plastics need drying before molding?
- Hygroscopic resins such as PA, PC and PBT absorb moisture, which damages the polymer during melting and makes parts brittle.
Conclusion
The injection molding process repeats fill, pack, cool and eject, but cost and quality are mostly decided in design, mold build and trials. Review wall thickness, gates, cooling and approval steps early. To plan your project, send your 3D model and 2D drawing to our engineers, and see our plastic injection molding services.