
Appliance Injection Molding: Materials, Finishes, Safety
Appliance injection molding is the production of plastic parts for home and kitchen appliances, such as housings, control panels, knobs, handles, drawers, fan blades, water tanks and internal brackets, using injection molds sized for long production runs. Appliance parts must look good, survive heat, water, detergents and daily handling, and stay dimensionally stable so doors, lids and panels fit for years.
Appliance parts mix cosmetic and technical demands in one product. For example, a coffee machine needs a glossy ABS front panel that matches its neighbor parts in color, a clear water tank that does not crack with descaler, and a PP or PPS part near the heater that keeps its shape when hot. In this guide, we explain which appliance parts are molded, the materials used, design rules, cosmetic finishes, food-contact and safety needs, tooling and production, and how to plan an appliance project. For housing design, see our guide to plastic housing design.
Appliance injection molding uses PP, ABS, PC, PC/ABS, PA, PBT, POM, SAN and PPS for parts across small kitchen appliances, cleaning devices, personal care products and white goods. Key requirements are color and gloss matching across parts, heat resistance near heaters and motors, resistance to water and detergents, flame-retardant grades near electrical parts, food-contact compliance for parts that touch food or water, and stable dimensions for doors and lids. Molds are usually built for long runs, with texture or high-gloss finishes and often two-shot or insert molding.
In short: appliance parts must look right, fit right and survive heat, water and cleaning.
Key points:
- Materials: PP, ABS, PC, PA, PBT, SAN.
- Requirements: cosmetics, heat, chemicals, food contact.
- Tooling: long-run molds with cosmetic finishes.
Which Parts Use Appliance Injection Molding?
Many household appliance parts use appliance injection molding.
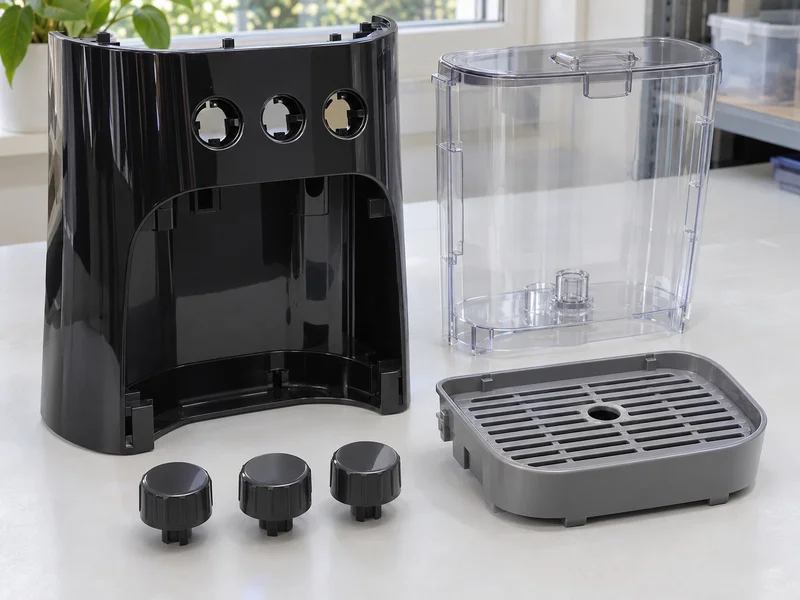
| Appliance | Typical molded parts |
|---|---|
| Kitchen appliances | Housings, jugs, lids, control panels, knobs |
| Coffee machines | Water tanks, drip trays, front panels |
| Vacuum cleaners | Body shells, dust bins, nozzles |
| Personal care | Hair dryer and shaver housings |
| Fans and heaters | Grilles, blades, bases |
| Washers and dryers | Detergent drawers, door frames, panels |
For example, a stand mixer uses a glossy housing, molded knobs and an internal gear cover in one product. Our guide to plastic gears covers drive parts inside appliances.
Key Takeaway: Above all, list every molded part in the appliance so colors, materials and tooling are planned together.
Which Materials Are Used for Appliance Parts?
In appliance injection molding, parts use materials chosen for appearance, heat and chemical resistance.
| Material | Typical appliance use | Note |
|---|---|---|
| PP | Drawers, tanks, inner parts | Low cost, chemical resistant |
| ABS | Housings, panels | Good gloss and color |
| PC / PC-ABS | Tough housings, clear parts | Impact resistant |
| SAN / PMMA | Transparent tanks and windows | Clear and stiff |
| PA / PA GF | Brackets, motor parts | Heat and strength |
| PBT, PPS | Parts near heaters | High heat resistance |
| POM | Gears, latches | Low friction |
For example, a kettle body near the heating plate often uses PP with heat stabilizers, while the lid button uses POM. Our guides to what plastics are best for hot temperatures and chemical resistance of plastics compare options.
Key Takeaway: In other words, choose each grade for its position in the appliance, not one resin for all parts.
How Should Appliance Parts Be Designed?
For appliance injection molding, parts should be designed for stiffness, fit and clean cosmetic faces.
- Uniform walls of about 2–3 mm for most housings
- Ribs and bosses sized to avoid sink on visible faces
- Draft for textured and glossy surfaces
- Snap fits and screws planned for service and assembly
- Venting and drainage where water collects
- Clearance around motors and heaters
For example, a detergent drawer needs drain slots and smooth inside corners so residue rinses out. Our guides to snap fit design and screw boss design give the rules.
Key Takeaway: For this reason, design for the full life of cleaning, heat and handling, not just the first assembly.
Which Cosmetic Finishes Suit Appliance Parts?
Cosmetic finishes in appliance injection molding range from high gloss to fine textures.
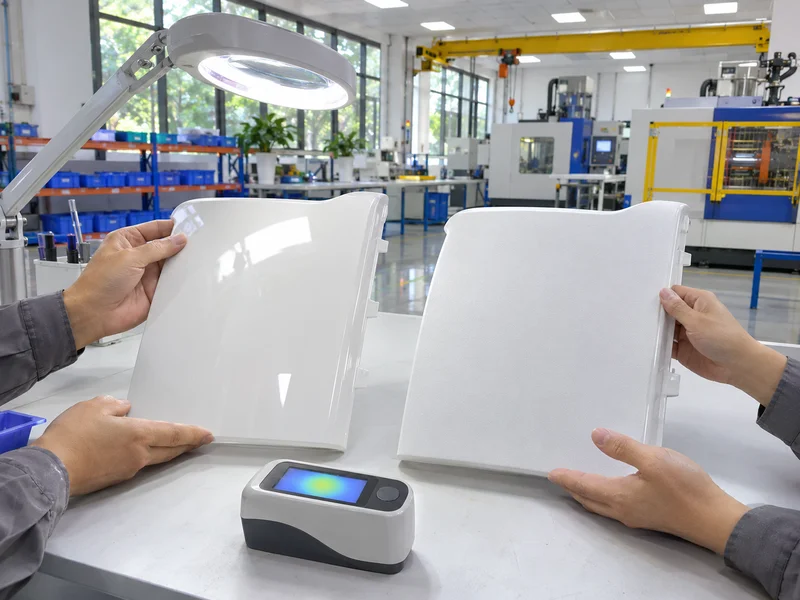
| Finish | Typical use |
|---|---|
| High gloss (SPI A) | Front panels, premium housings |
| Fine texture (VDI 18–24) | Handles, side panels, hides scratches |
| Two-tone or two-shot | Soft grips, color accents |
| In-mold decoration | Printed control panels |
| Laser marking | Symbols, scales, codes |
For example, a glossy black front panel shows every sink mark and weld line, so gates and ribs must be planned carefully. Our guides to VDI 3400, mold polishing and masterbatch cover texture, gloss and color.
Key Takeaway: Overall, approve color and gloss on molded parts from every mold that sits side by side in the product.
What Safety and Food-Contact Rules Apply to Appliance Parts?
Appliance parts must meet electrical safety and, where relevant, food-contact rules.
- Flame rating: UL 94 V-0 or V-2 grades near live parts, per product standard
- Glow-wire tests: for parts holding live connections, per IEC 60335
- Food contact: FDA or EU food-contact compliant grades
- Restricted substances: RoHS and REACH compliance
- Heat and aging: parts near heaters tested at temperature
For example, a terminal holder inside a kettle base needs a flame-retardant grade, while the water jug needs a food-contact PP or copolyester. Appliance safety standards are published by the IEC, and flame ratings by UL. Our guide to flame retardant plastics explains the grades.
Key Takeaway: Equally, confirm which product standard applies before the material is chosen.
How Is Appliance Injection Molding Production Planned?
Appliance injection molding production is planned for long runs and consistent cosmetics.
- Steel: pre-hardened or hardened steel for volume and polish
- Cavities: single for large housings, multi-cavity for knobs and small parts
- Hot runners: for large cosmetic parts and less waste
- Two-shot or overmolding: for grips and seals
- Color control: same masterbatch and settings across molds
- Packaging: protective film or trays for glossy faces
For example, a family of matching housing parts may be molded on different presses but must use the same color lot and gloss target. Our two-shot injection molding page and guide to high volume injection molding explain these choices.
Key Takeaway: As a rule, protect glossy parts from the mold to the carton.
How Should an Appliance Injection Molding Project Be Planned?
An appliance injection molding project should be planned part by part, with shared color and quality standards.
- Part list with material, color and finish for each part
- 3D models and 2D drawings with cosmetic zones
- Safety and food-contact requirements
- Annual volume for cavity and steel choices
- DFM review for sink, warpage and fit
- Color and gloss approval on molded samples
- Assembly checks with mating parts
For example, approving a coffee machine panel, tank and drip tray together avoids three slightly different blacks. Our plastic injection molding page explains how we take molded parts from T1 to repeat production.
Key Takeaway: Finally, approve the whole set of visible parts together, not one at a time.
FAQ
- Q: What is appliance injection molding?
- Molding plastic parts for home and kitchen appliances.
- Q: Which plastics are used in appliances?
- PP, ABS, PC, SAN, PA, PBT, POM and PPS, depending on the part.
- Q: Do appliance parts need flame-retardant plastic?
- Parts near live electrical parts often do, per the product standard.
- Q: Which parts need food-contact plastic?
- Water tanks, jugs, lids and any part touching food or drinks.
- Q: How is color kept consistent across parts?
- With the same color concentrate, settings and approval samples for every mold.
Conclusion
Appliance injection molding combines cosmetic quality with heat, chemical and safety demands. Plan materials, finishes and approvals for the whole set of parts. To quote appliance parts, send your 3D model and 2D drawing to our engineers.