
Injection Molding Defects and Solutions: How to Get Best Results
Injection molding defects and solutions are easiest to manage with a map: what the defect looks like, where it appears, what usually causes it and which change fixes it. Most defects fall into a few families, such as filling problems, shrinkage problems, surface marks, material problems and tool-related defects. Once a defect is placed in the right family, the troubleshooting path becomes much shorter.
The biggest time waster in troubleshooting is changing many settings at once. For example, raising pressure, temperature and speed together may remove a short shot but create flash and burns, and nobody knows which change helped. In this guide, we give a troubleshooting map of injection molding defects and solutions: a defect table, the main families, a structured method, when the fix is in the tool, the design or the material, and how to prevent recurrence. Each section links to a detailed guide. For the process background, see our guide to the injection molding process.
Injection molding defects and solutions can be grouped into five families: filling defects (short shots, flash, jetting, hesitation), shrinkage defects (sink marks, voids, warpage), surface defects (flow marks, weld lines, gate blush, splay, burn marks), material defects (black specks, brittleness, delamination) and tool-related defects (ejector marks, drag marks, gate vestige). A reliable fix comes from identifying the family, checking material condition, running short-shot studies, changing one variable at a time, and correcting the tool or design when the process window is too narrow.
In short: classify the defect, check material and process first, change one thing at a time, and fix the tool or design when the window is too narrow.
Key points:
- Map first: each defect family has typical causes.
- One change at a time: proves what worked.
- Root cause: process, tool, design or material.
What Are the Main Injection Molding Defects and Solutions?
The main injection molding defects and solutions are summarized in this map.
| Defect | Typical appearance | Common causes | First solutions |
|---|---|---|---|
| Short shot | Incomplete part | Low shot, venting, hesitation | Check shot size, vents, speed |
| Flash | Thin excess plastic | Clamp, parting line wear, high pressure | Check clamp, shut-offs, pressure |
| Sink marks | Surface depressions | Thick sections, low pack | Pack longer, core out walls |
| Warpage | Bent or twisted part | Uneven cooling, orientation | Balance cooling, gate location |
| Weld lines | Lines where flows meet | Flow fronts meeting cold | Raise temperatures, move gate |
| Flow marks | Ripples, bands | Cold or slow flow front | Raise mold temperature, speed |
| Jetting | Snake-like mark | Melt jets from gate | Change gate, slow start |
| Splay | Silver streaks | Moisture, degradation | Dry resin, check temperature |
| Burn marks | Black or brown areas | Trapped gas | Improve venting, slow end of fill |
| Black specks | Dark particles | Degraded material, contamination | Purge, clean, check residence |
Our guide to 11 injection molding defects and troubleshooting gives more examples.
Key Takeaway: Use the map to choose the first two tests, not to change everything.
Which Injection Molding Defects and Solutions Relate to Filling?
Filling defects and solutions relate to how the melt reaches every part of the cavity.
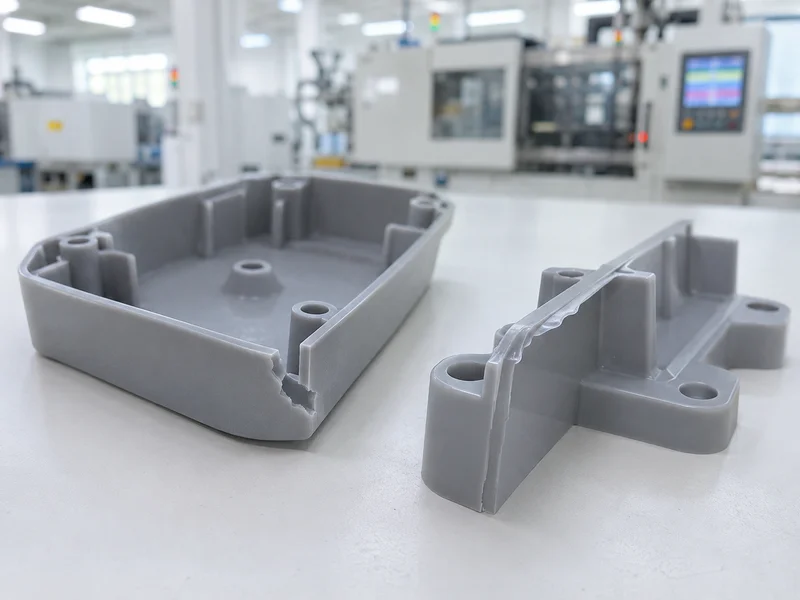
- Short shot: check shot size, venting and flow restrictions; see short shot injection molding.
- Flash: check clamp force, shut-off surfaces and pressure; see injection molding flash.
- Jetting: change gate type or position and start injection slowly; see jetting injection molding.
- Hesitation: avoid thin sections before thick ones.
For example, a part that shows short shots and flash at the same time usually has an unbalanced fill or tool problem, not a simple pressure issue.
Key Takeaway: Short shot plus flash together points to the tool.
Which Defects Relate to Shrinkage and Cooling?
Shrinkage and cooling defects relate to how the part cools and contracts after filling.
- Sink marks: thick sections and short packing; see troubleshooting injection molding sink marks.
- Voids: internal shrinkage in thick sections.
- Warpage: uneven shrinkage from cooling, orientation or packing; see warpage plastic parts.
- Dimensional drift: changes in mold temperature or cycle time.
For example, sink opposite a rib usually needs a thinner rib or longer pack time. Our guide to plastic shrinkage explains shrinkage behavior.
Key Takeaway: Shrinkage defects often need design changes, not only process changes.
Which Defects Relate to Surface Appearance?
Surface appearance defects relate to how the melt front meets the mold surface.
- Flow marks: cold or hesitating flow front; see flow marks in injection molding.
- Weld lines: flow fronts meeting; see 9 ways to fix injection molding weld lines.
- Gate blush: unstable flow at the gate; see gate blush injection molding.
- Splay: moisture, shear or degradation; see splay in injection molding.
- Burn marks: trapped gas at the end of fill.
For example, silver streaks that vanish after longer drying were moisture splay. Our guide to plastic resin drying explains drying.
Key Takeaway: Check drying before changing the process for surface streaks.
What Method Should You Use for Injection Molding Defects and Solutions?
The method for injection molding defects and solutions should be structured and evidence-based.

Troubleshooting steps:
- Describe the defect: where, how often, which cavities.
- Check material: grade, lot, moisture, regrind.
- Check the machine: temperatures, cushion, check ring, clamp.
- Run short shots to see the fill pattern.
- Change one variable at a time and record results.
- Confirm the fix over a production run.
- Document the cause and setting changes.
For example, a defect in only one cavity of an 8-cavity mold points to that cavity’s vent, gate or cooling, not the process. Our guide to scientific molding explains process studies.
Key Takeaway: Cavity-specific defects point to the tool.
When Is the Fix in the Tool, Design or Material?
The fix is in the tool, design or material when the process window is too narrow to hold the part reliably.
- Tool fixes: vents, gate size or location, cooling, shut-offs, polish
- Design fixes: wall thickness, ribs, radii, gate-friendly geometry
- Material fixes: better-flowing grade, different filler, drying control (test methods for plastics are published by ASTM International)
For example, a part that only fills without flash in a 2 °C temperature window needs a tool or design change. Our injection mold manufacturing team uses steel-safe adjustments after trials.
Key Takeaway: A narrow process window is a design or tool problem, not an operator problem.
How Do You Prevent Defects From Coming Back?
You prevent defects from coming back by locking the process and monitoring it.
Prevention measures:
- Documented process sheets with limits
- Material handling rules for drying and regrind
- Preventive mold maintenance
- First-piece and in-process checks
- Corrective action records such as 8D reports
For example, a burn mark that returns every few weeks may be caused by vents filling with residue; a cleaning interval in the maintenance plan prevents it. Our guide to the 8D report explains corrective action.
Key Takeaway: Recurrent defects need maintenance and monitoring, not repeated firefighting.
FAQ
- Q: What are the most common injection molding defects?
- Short shots, flash, sink marks, warpage, weld lines, flow marks, splay and burn marks.
- Q: How do you troubleshoot injection molding defects?
- Classify the defect, check material and machine, run short shots and change one variable at a time.
- Q: What causes short shots and flash together?
- Usually an unbalanced fill or a tool problem.
- Q: When should the mold be changed to fix a defect?
- When the process window is too narrow to mold good parts reliably.
- Q: How do you stop defects from recurring?
- Lock the process, control material, maintain the mold and monitor production.
Conclusion
Injection molding defects and solutions become manageable with a map, a structured method and the willingness to fix the tool or design when needed. Change one thing at a time and lock the result. To review a molding problem, send your 3D model and 2D drawing to our engineers.